How To: 15 Tips, Tricks & Shortcuts Every Android Pro Should Know About
There are a number of options and hidden menus within Android that provide users more control over their device. With this control, you can better manage how your phone operates. We came up with a list of tips and shortcuts that, when used, will slowly put you on a path to becoming an Android power user.With our list, we decided to avoid the more advanced topics such as ADB and rooting. We also focused on software that comes with the OS and avoided any tips that would require third-party apps. This way, our list covers a wide array of devices, as OEM skins and fragmentation imposes variability on Android.
1. Force Split Screen Mode for All AppsSplit screen mode is a pretty useful feature introduced in Android Nougat, allowing multiple apps to be open at the same time. However, as you may have experienced, not all apps support the feature. Thankfully, Android provides a way to force those stubborn apps to work with split screen.First, you'll need to unlock Developer Options. Head to Settings –> About phone (or Settings –> System –> About phone), then tap the "Build number" entry 7 times. After that, select "Developer Options" from the main Settings page (or Settings –> System on Oreo), then scroll to the bottom and enable "Force activities to be resizable." Be aware that some apps that originally didn't support the feature will become unstable and buggy once forced into split screen mode. They may crash occasionally, so be aware this isn't a perfect solution.
2. Force Apps to Install on Your SD CardLike split screen mode, some developers don't support Android's ability to install apps on the micro SD Card. These apps will by default block your ability, but you can circumvent their block in a similar fashion. Head to Developer Options and select "Force allow apps on external." Once enabled, reboot your phone and you should now be able to move any app.Be aware that some app will not work when you force them this way. This is because the developers may have designed the app to work in a specific folder, which it will only locate when installed on the internal storage. Therefore, avoid moving system apps, such as the pre-installed Google apps, to prevent problems.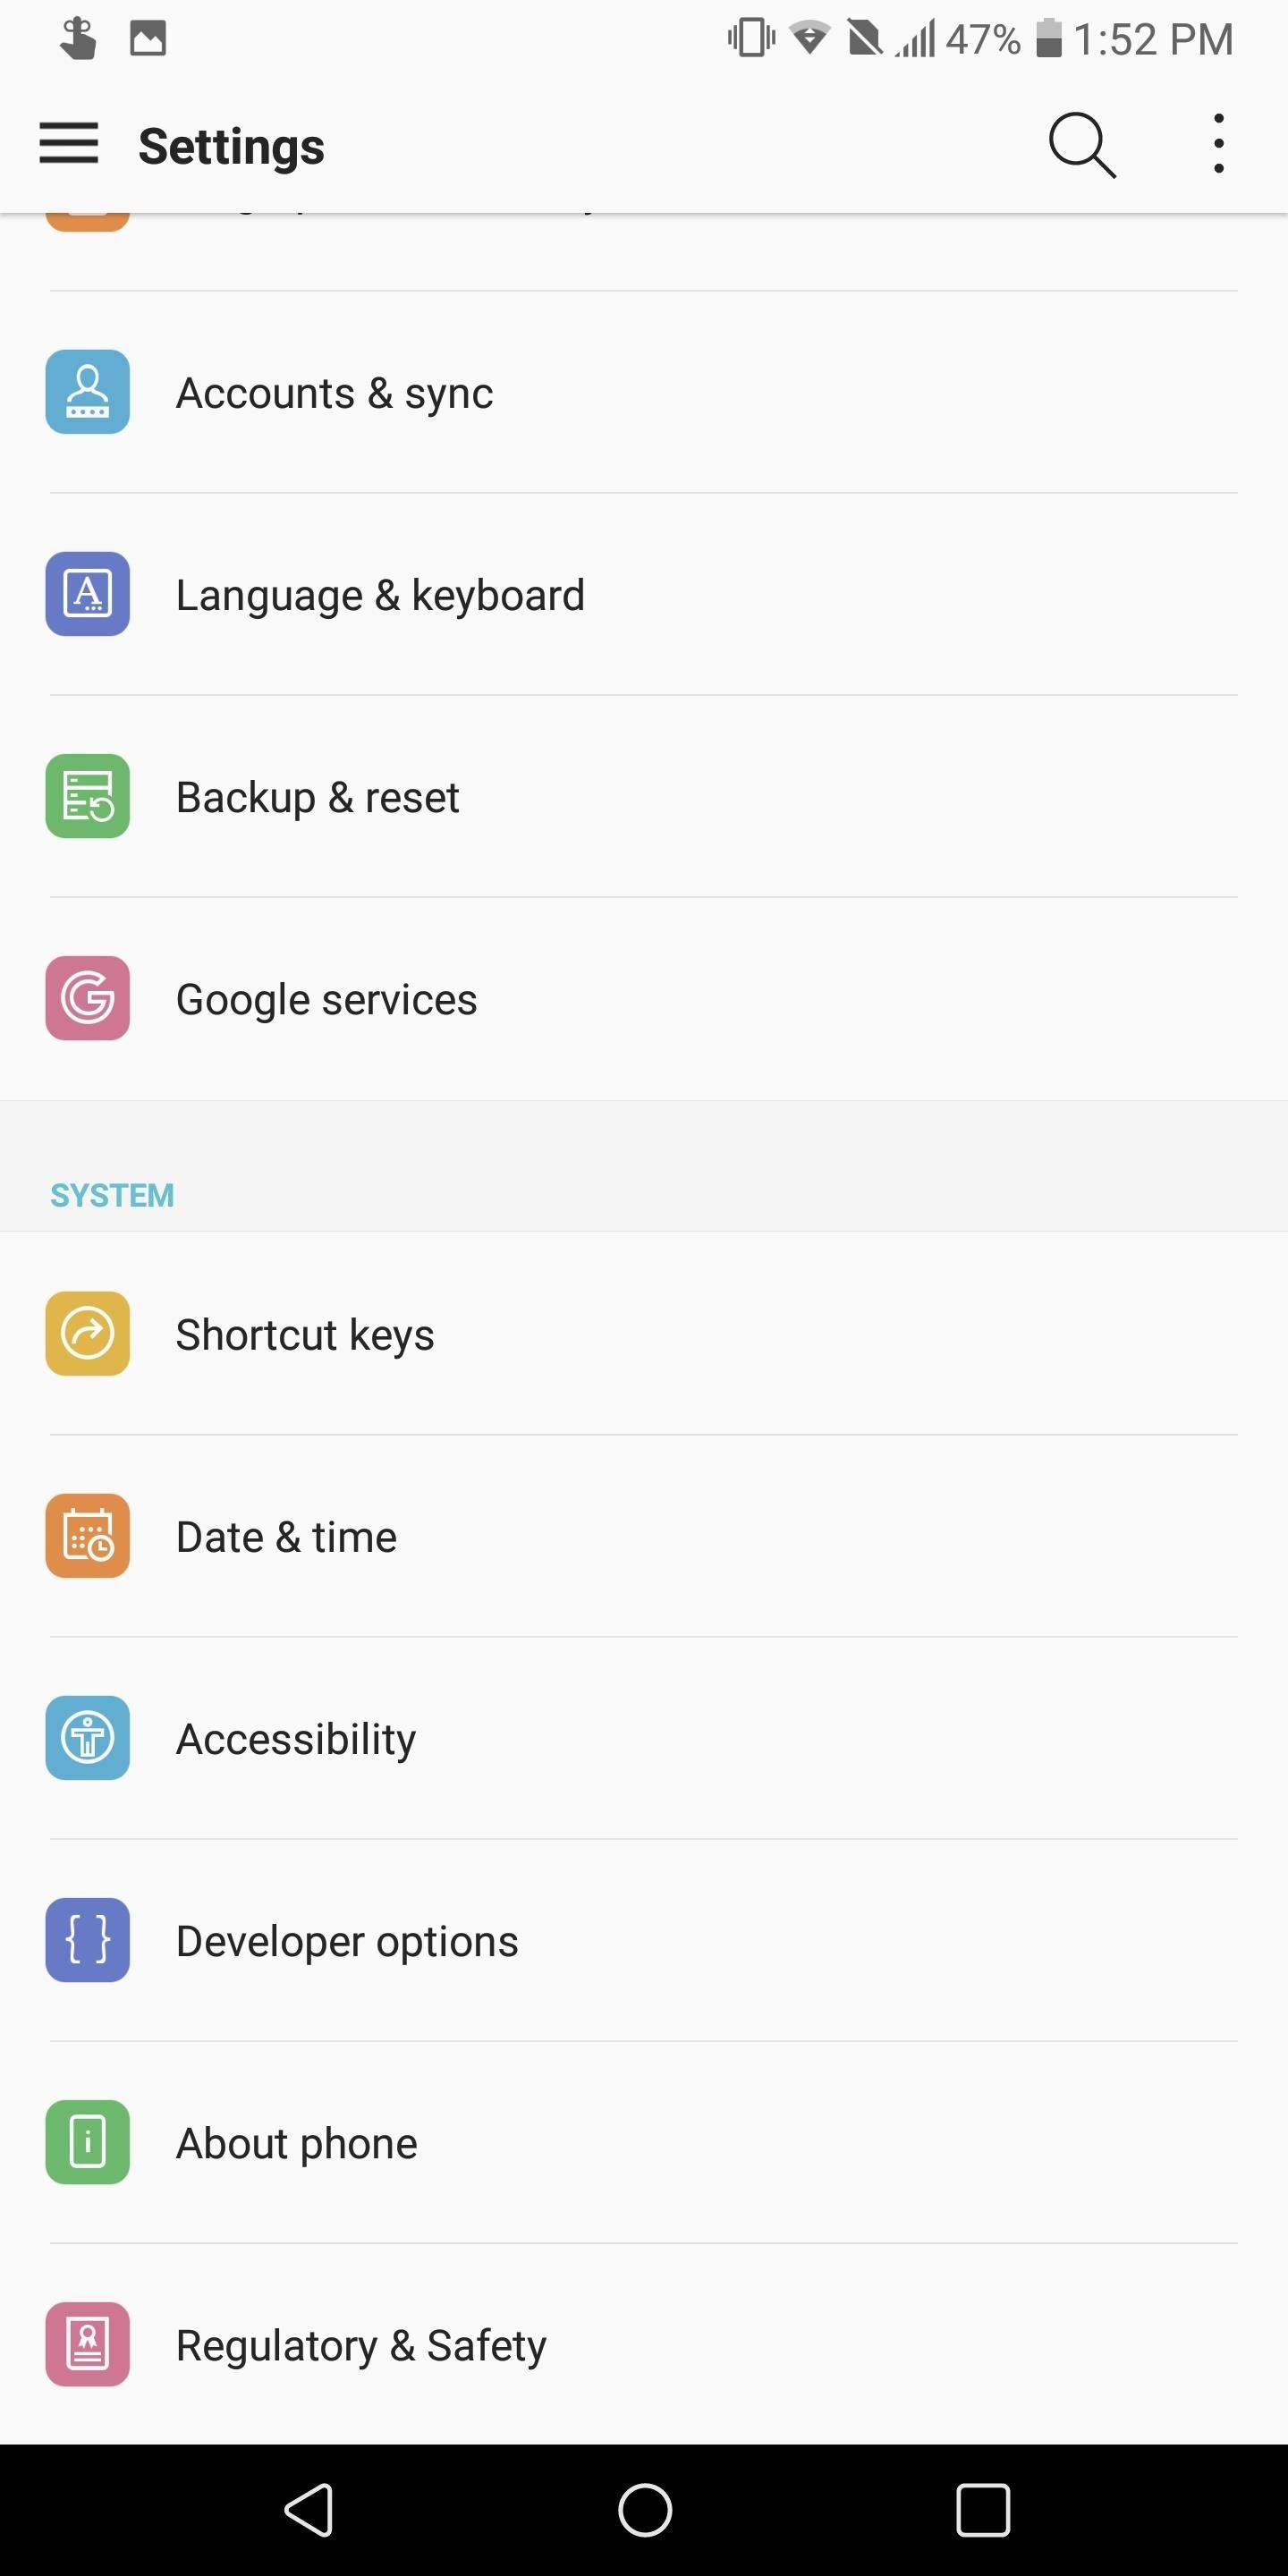
3. Speed Up AnimationsThere is a very easy way to improve the perceived performance of your smartphone. This method not only makes newer devices feel snappier, but it improves the speed of older devices without having to factory reset them. First, you need to unlock the hidden Developer Options menu.After unlocking Developer Options, select the option from your main Settings page (or in Settings –> System on Oreo). From there, scroll down until you find the grouping labeled Drawing. Within this category, you'll find three options: Window animation scale, Transition animation scale, and Animator duration scale. Select each option and change the scale to .5x.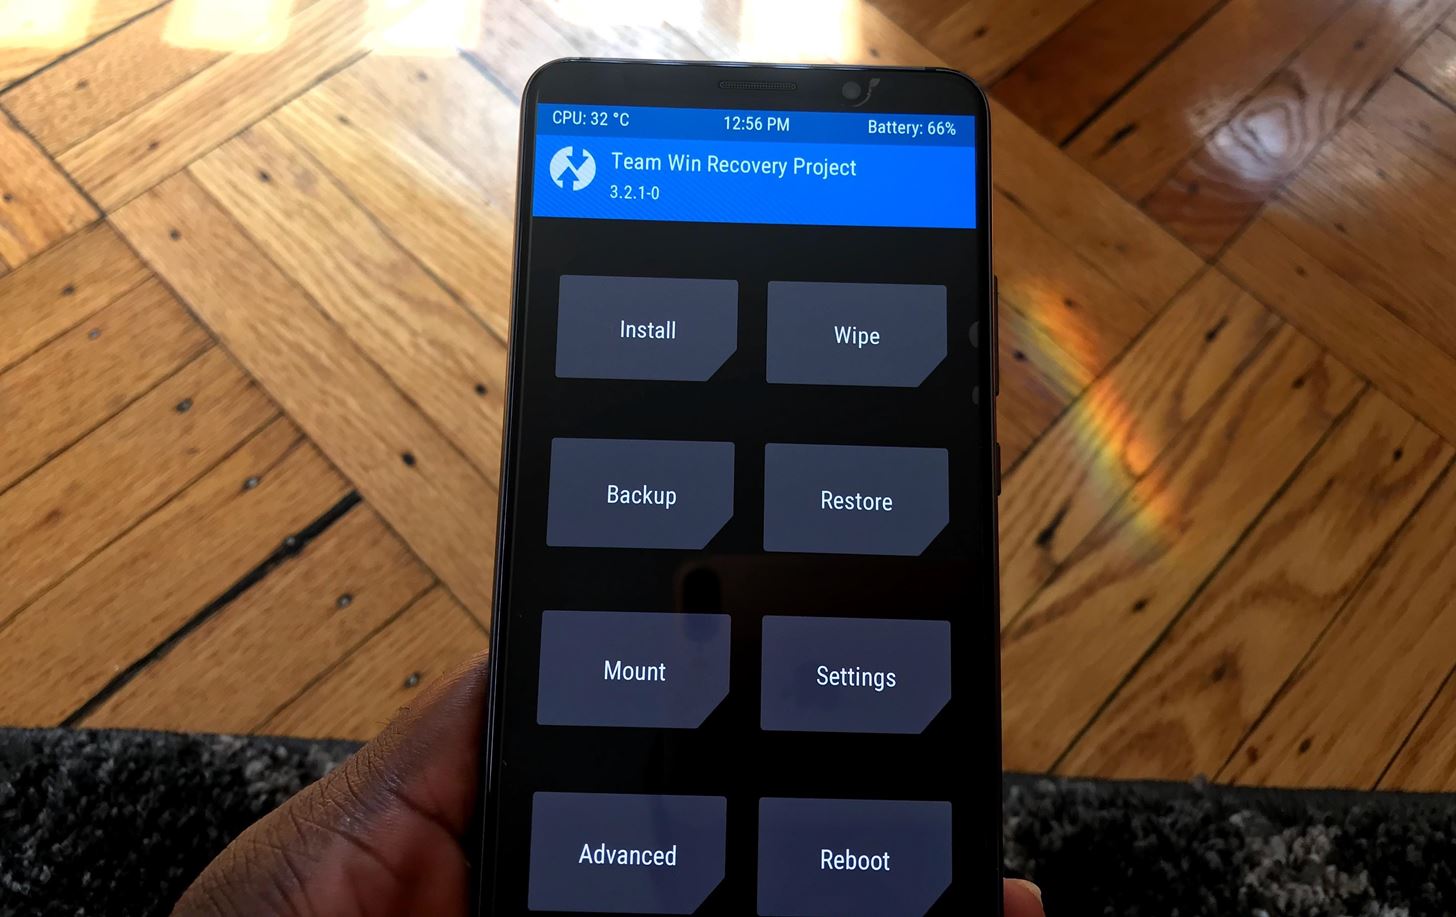
4. Enter Recovery Mode (Most Phones)Recovery Mode is a vital tool for those wishing to do more on their device. You can use it to apply OTA update, factory reset your device, and recover from a soft brick by installing images from the internal (and external) storage. Accessing the Recovery Mode is one of the first steps to rooting your device. Fortunately, most Android smartphones use the same button combination to enter this mode.First, turn off your phone. Then with your device off, hold the volume down and power buttons at the same time until the device turns on and the logo appears. Then use the volume rocker to navigate through the different options, and press the power button to select an option. For the majority of phones, these two buttons will allow you to successfully enter Recovery Mode. For the latest Samsung devices with the Bixby button, the combination is slightly different. With the phone shut down, hold volume up, Bixby button, and power until the phone turns on and the logo appears.
5. Enter Recovery Mode FasterWith the button combination for Recovery Mode, the power button's sole purpose is to turn on the phone. However, when restarting or when your device is bootlooping, your device will automatically turn on, making the power button unnecessary. Therefore, during restarts and bootloops, you can omit the power button and simply hold the other button (or buttons for Samsung) until the logo appears.For most phones, here's the best way to try it: Restart your phone from the power menu. When the screen goes black, press and hold the volume down button. From there, your phone will boot itself into Fastboot mode, where you can select the "Recovery Mode" option to boot to recovery.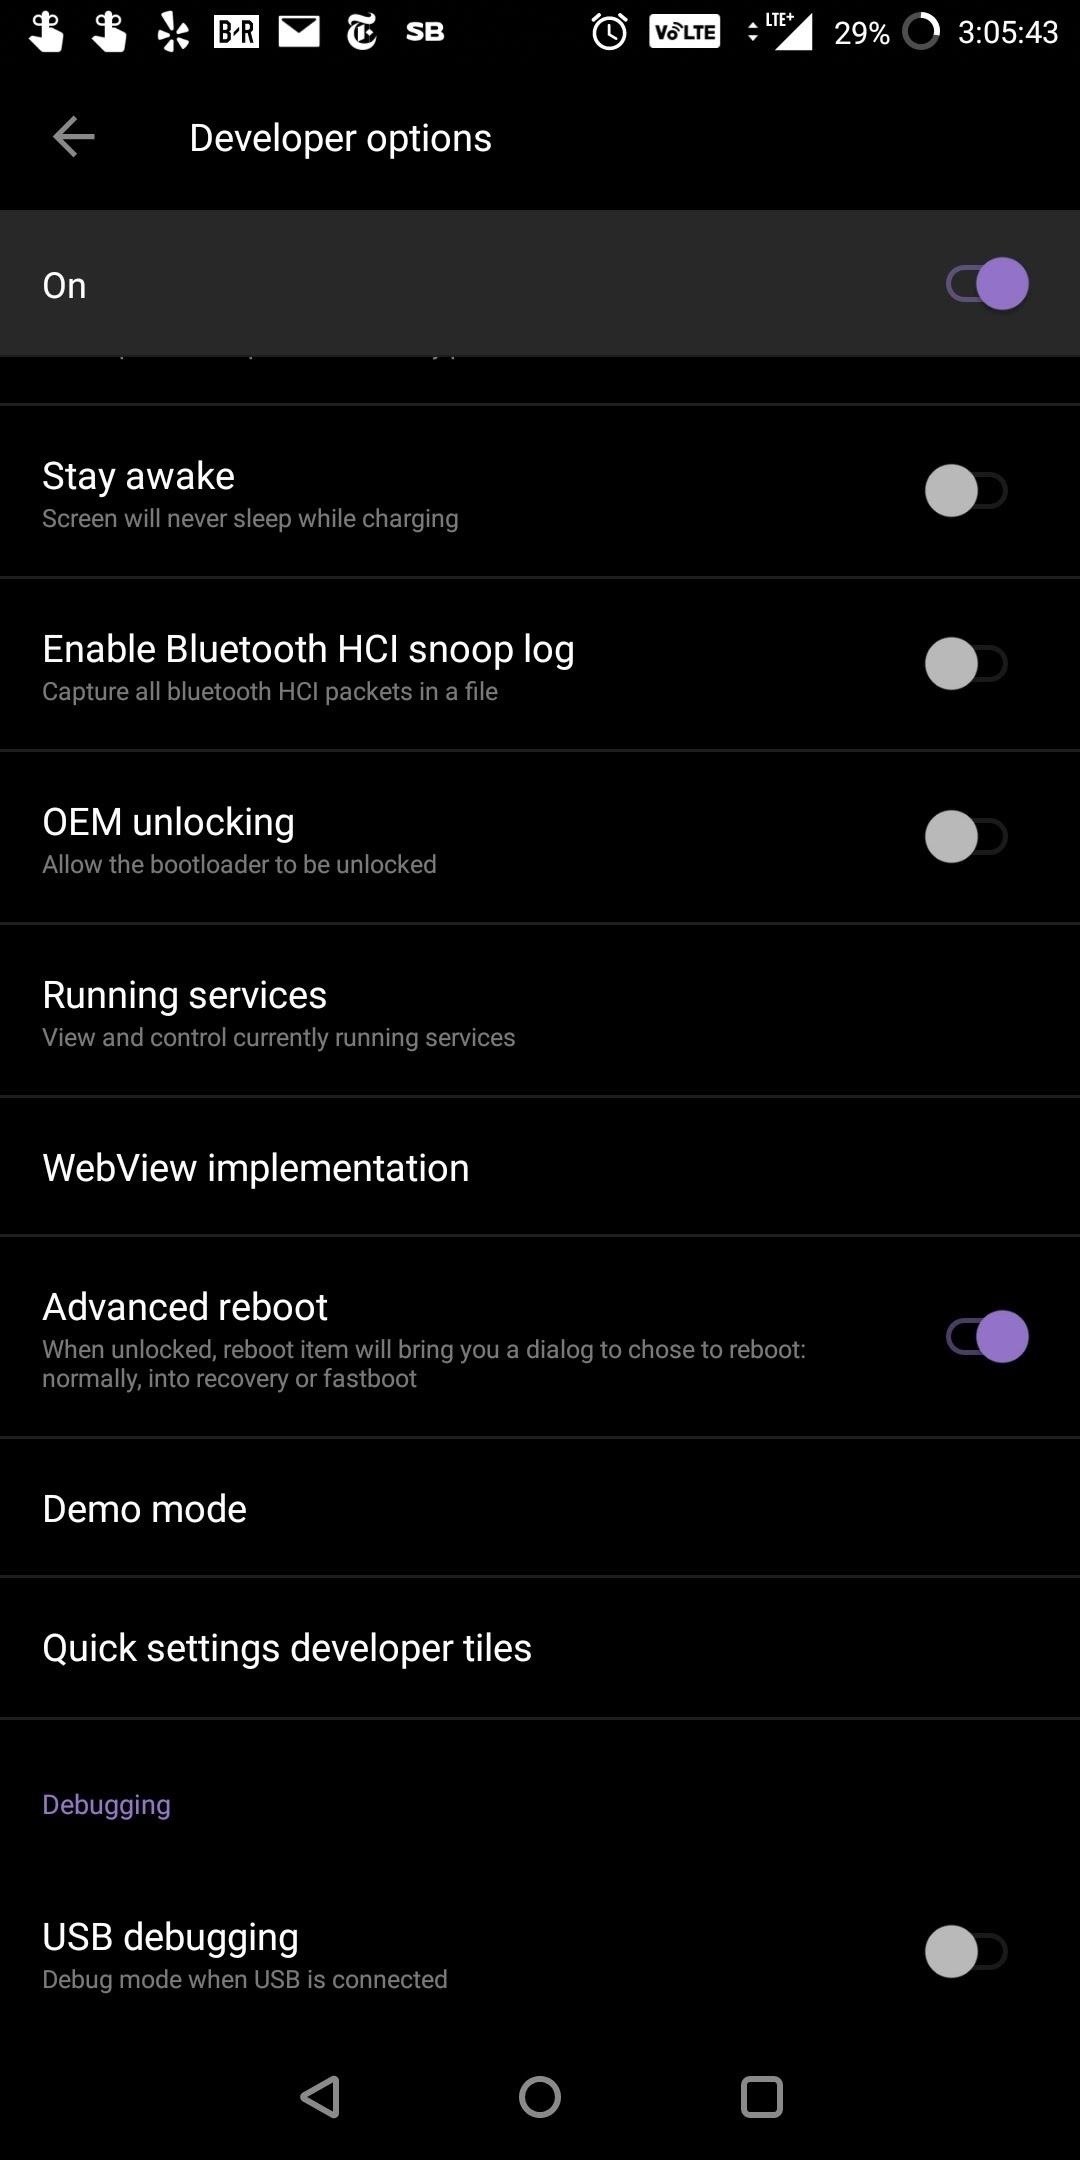
6. The FASTEST Way to Enter Recovery ModeWhile the previous two methods are effective at providing you access to Recovery Mode, there is a faster method. It's not available on all phones, but it works on most. This method requires you to enter Developer Options and enable "Advanced Reboot."With this option, whenever you enter the power menu (by long pressing the power button) and choose "Reboot," you'll see extra options including "Recovery" and "Bootloader." Once selected, your device will automatically reboot into the corresponding mode. Be aware that many OEMs remove the option from "Developer Options." If this happens to be the case, the other two methods will work.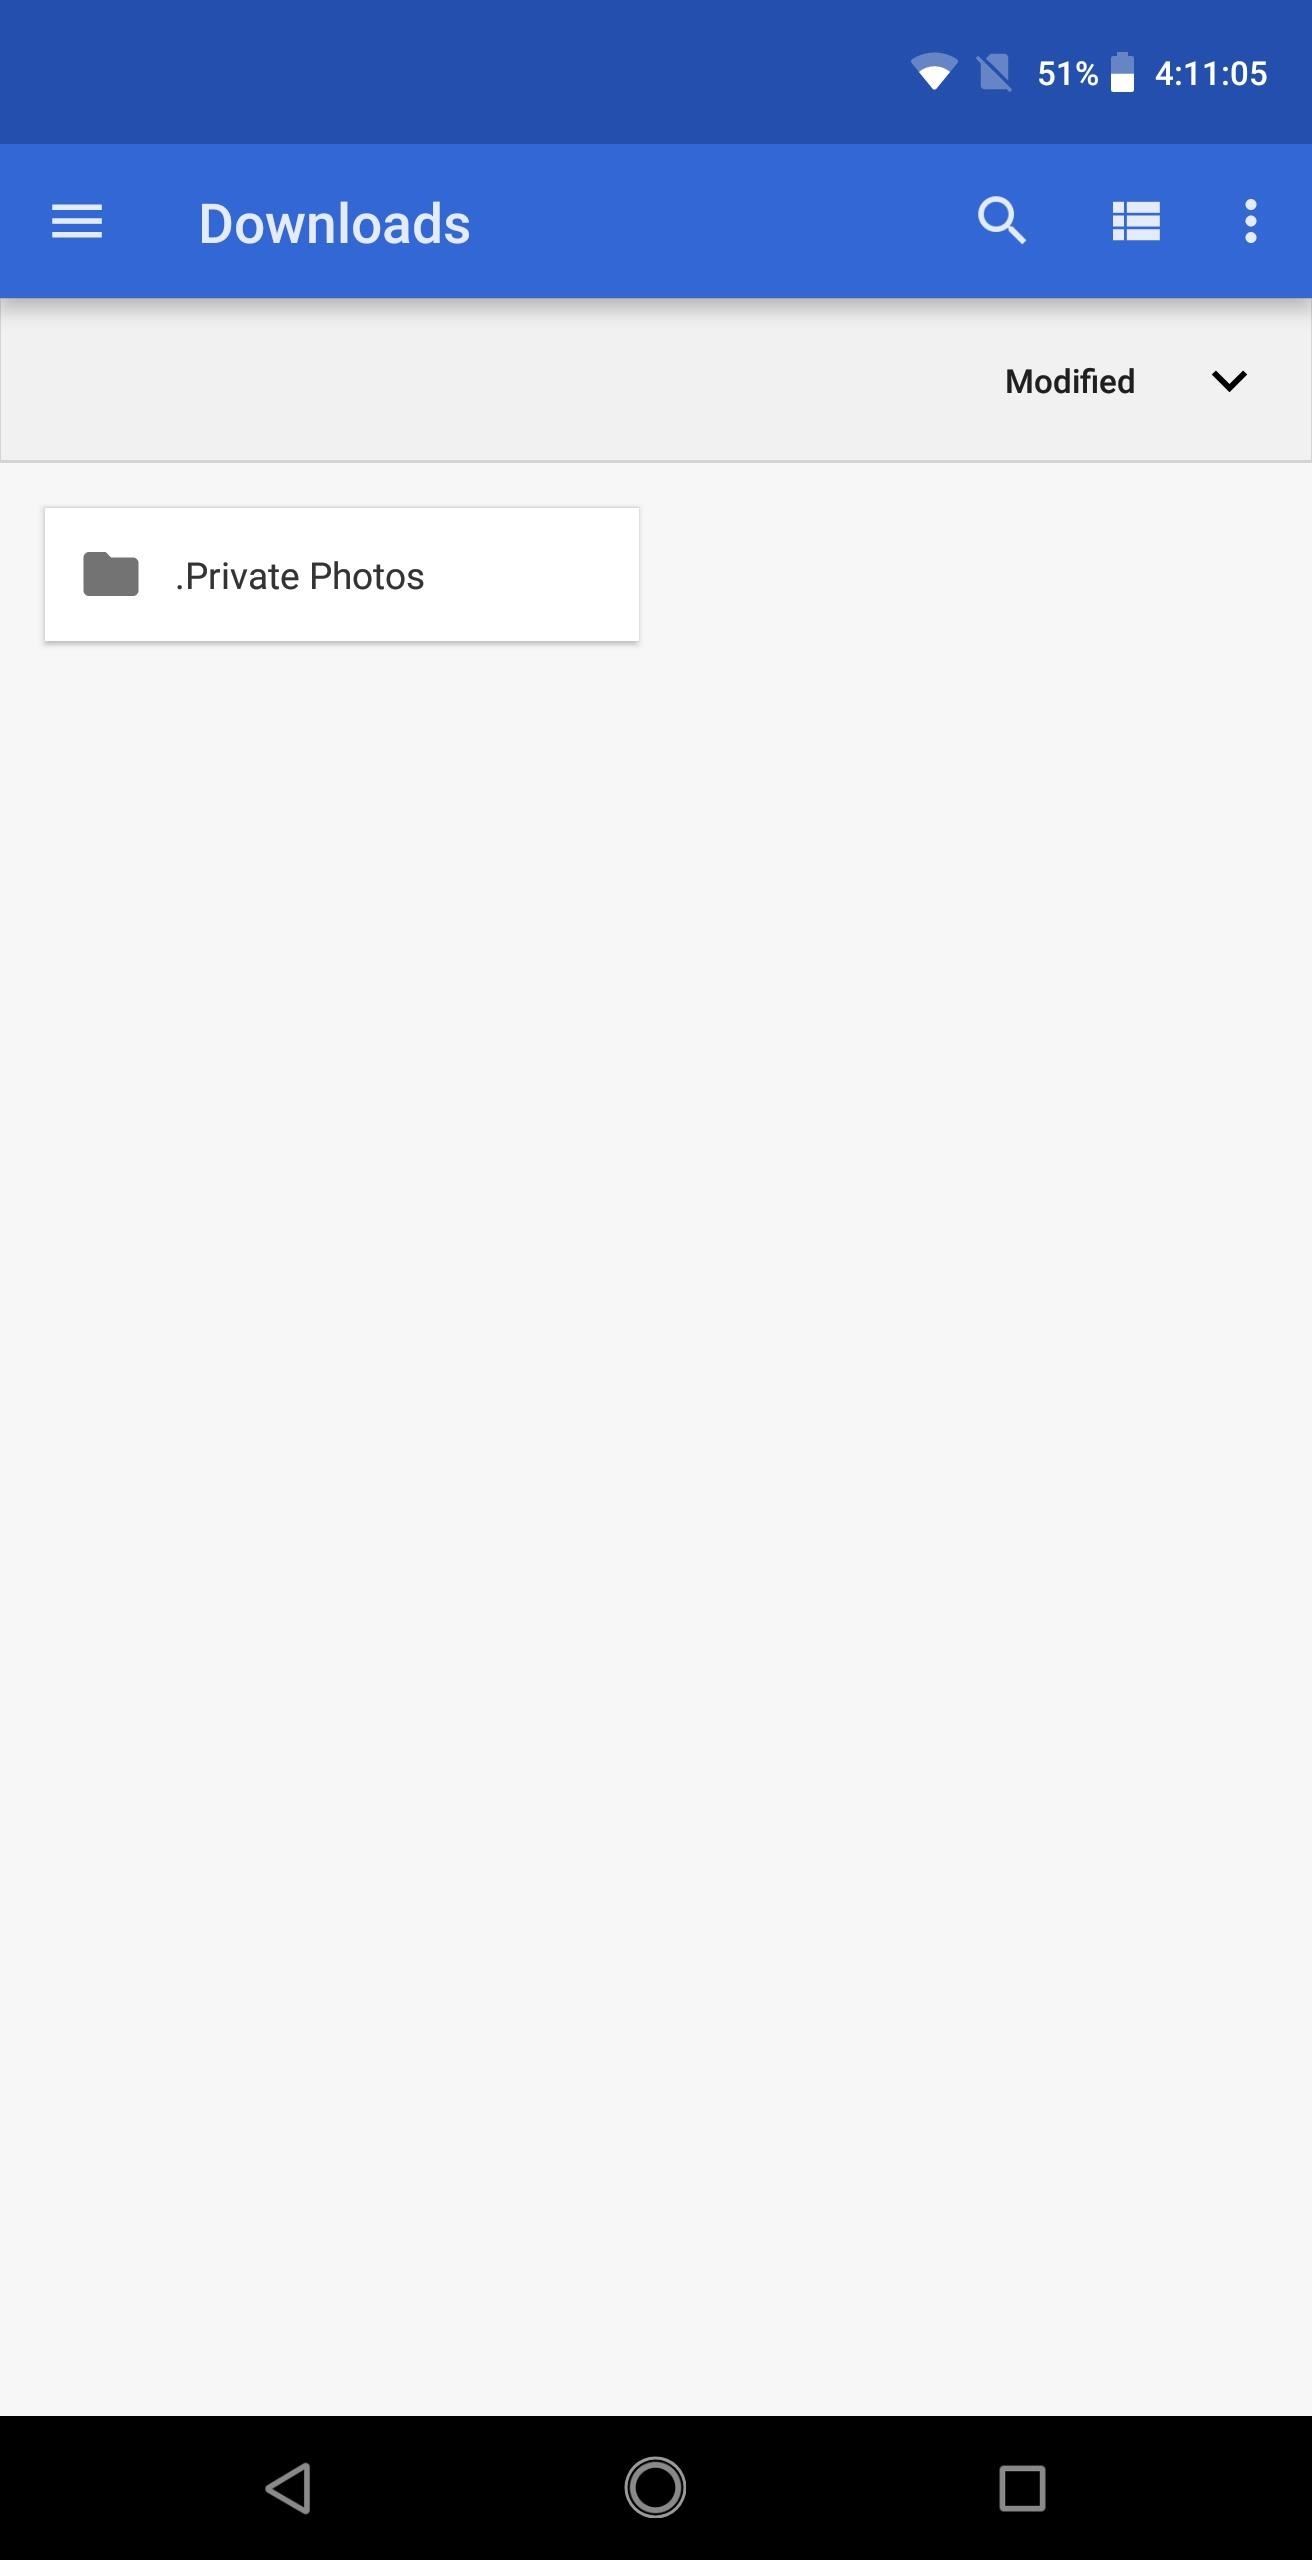
7. Hide FoldersWhile many gallery and file manager apps include the ability to hide folders, Android has a method which doesn't require the assistance of third-party apps. Using the default File Manager app, create a folder with a name that starts with a ".", such as ".Folder" or ".PrivatePhotos." Once created, you can move your private photos to this folder, as it won't show up in the gallery or Google Photos.However, some OEMs replace the Android's default File Manager with their own which prevents the creation of these types of folders (such as LG UX). For those running a smartphone with this issue, you will need to download a third-party File Manager to accomplish the same thing. Check out our list below for the top ones on the Play Store.Don't Miss: The 5 Best File Managers on the Play Store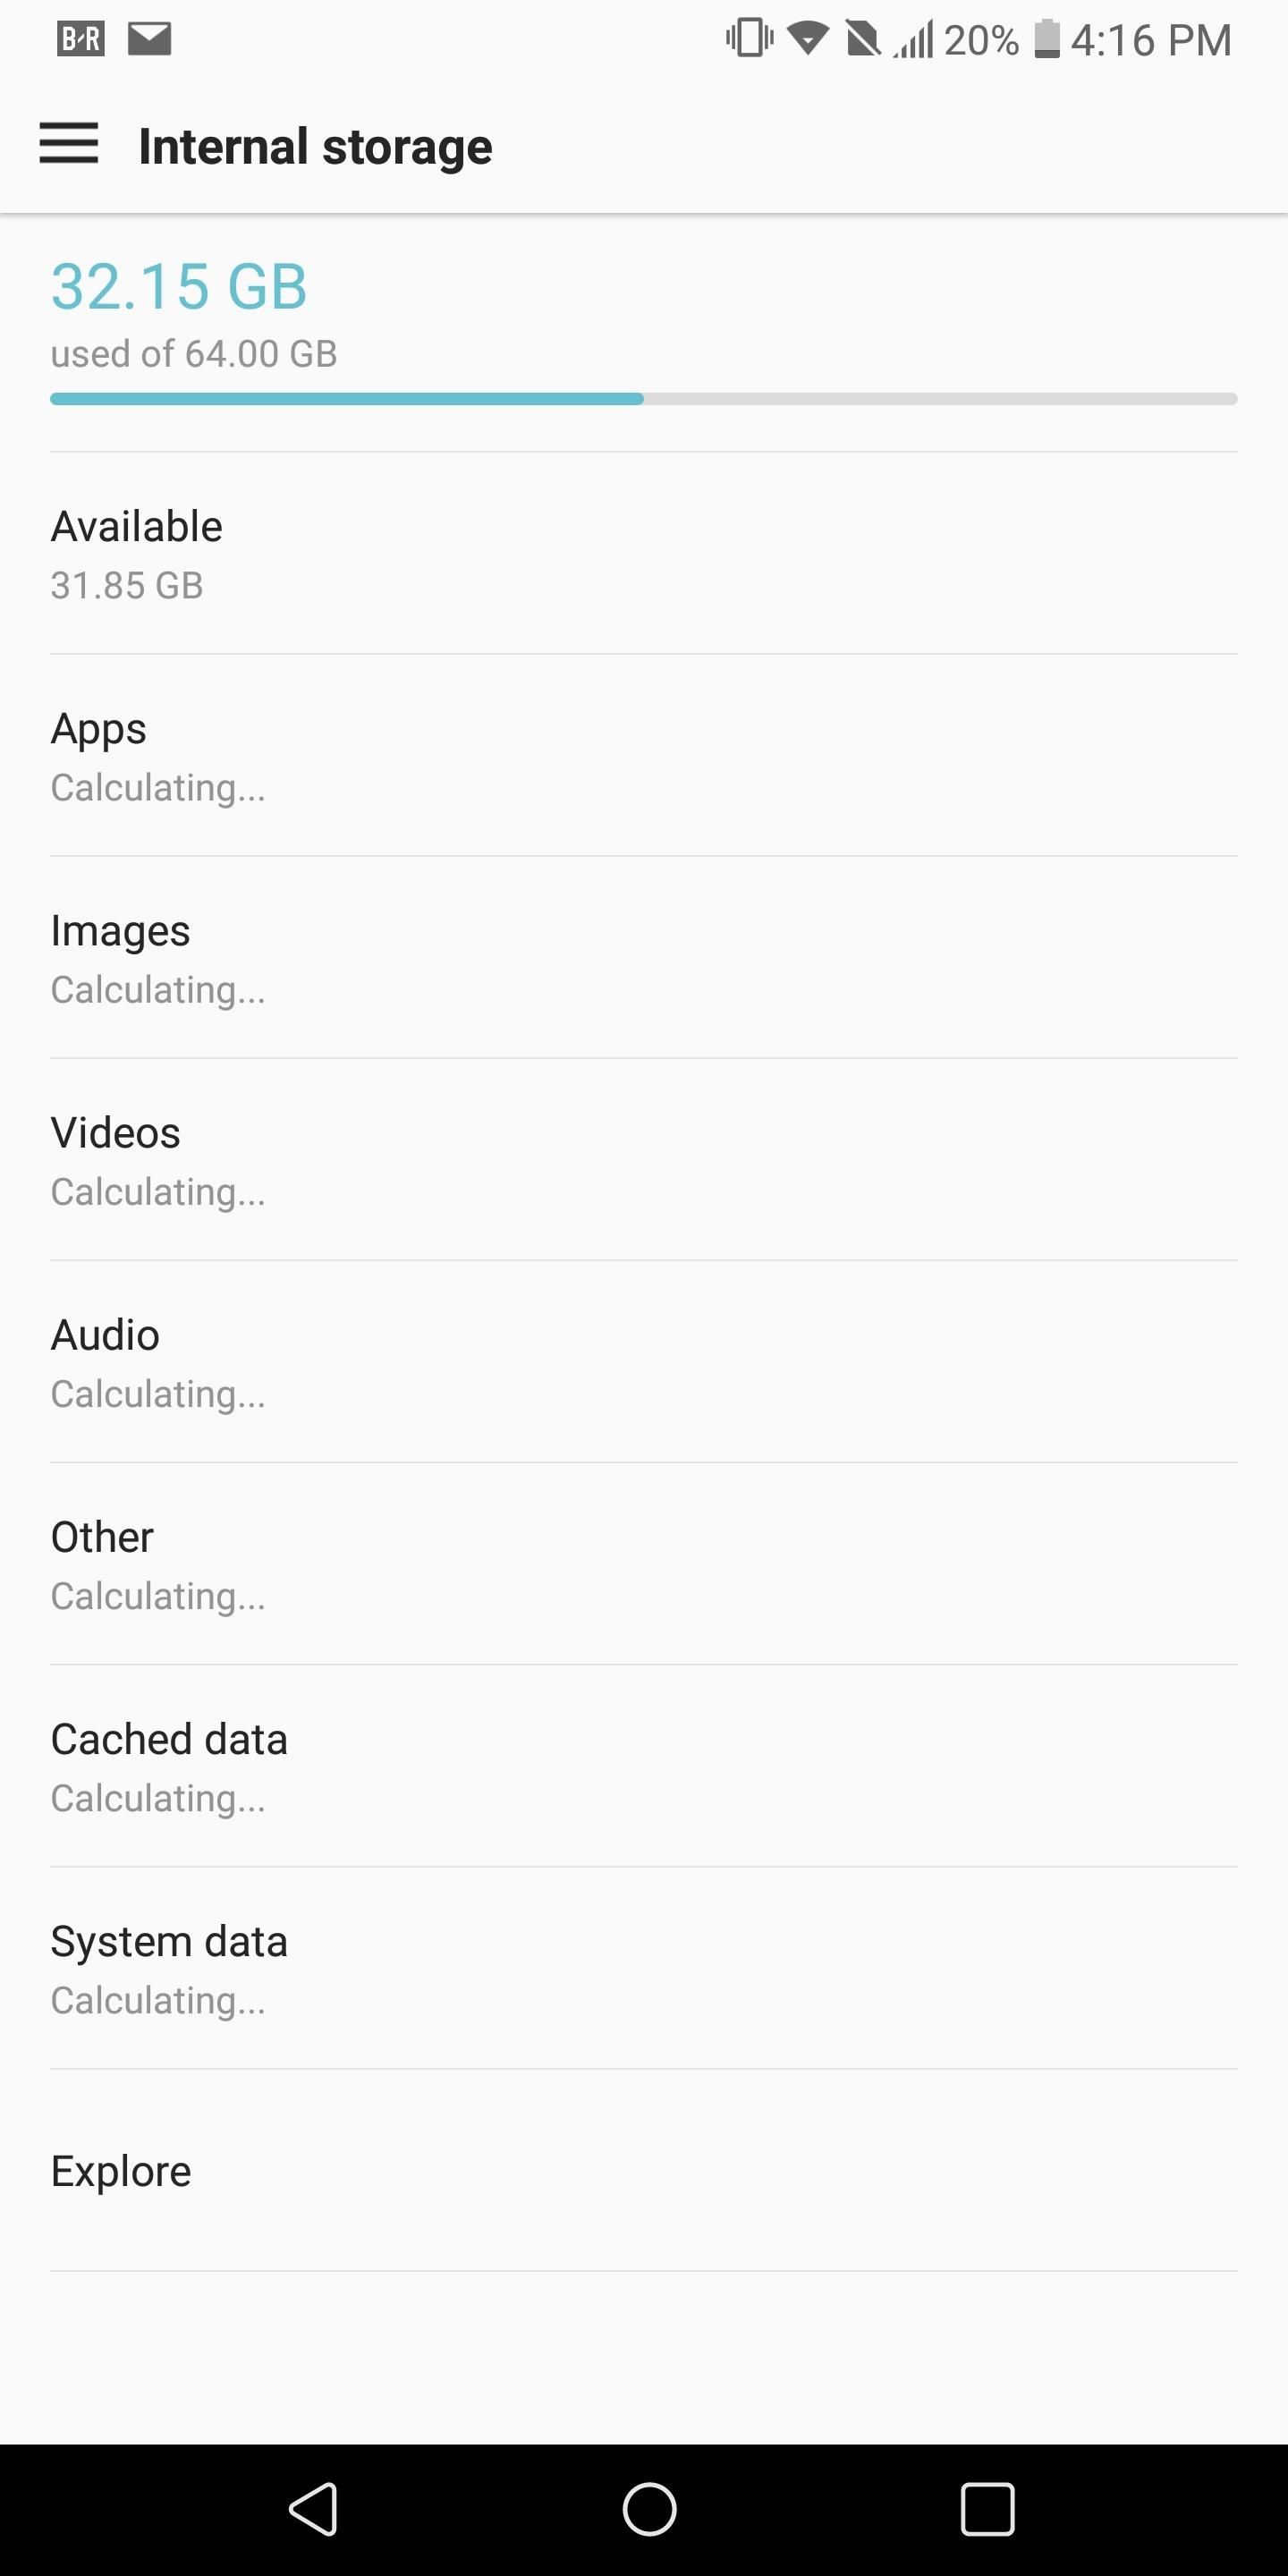
8. Acess More Folders with the Default File ManagerAndroid's default File Manager is limited. The app will normally only show you the Downloads folder and it can only scan and display certain types of files (such as images, videos, and audio). However, there is a way to access all the folders on the internal storage without installing a third-party file manager.Enter Settings and select "Storage." At this point, there are two ways to achieve the same result. Either your device will have an option named "Explore" or "Files." Choose this option to open the File Manager with a complete list of all folders on your internal drive that don't require root to access.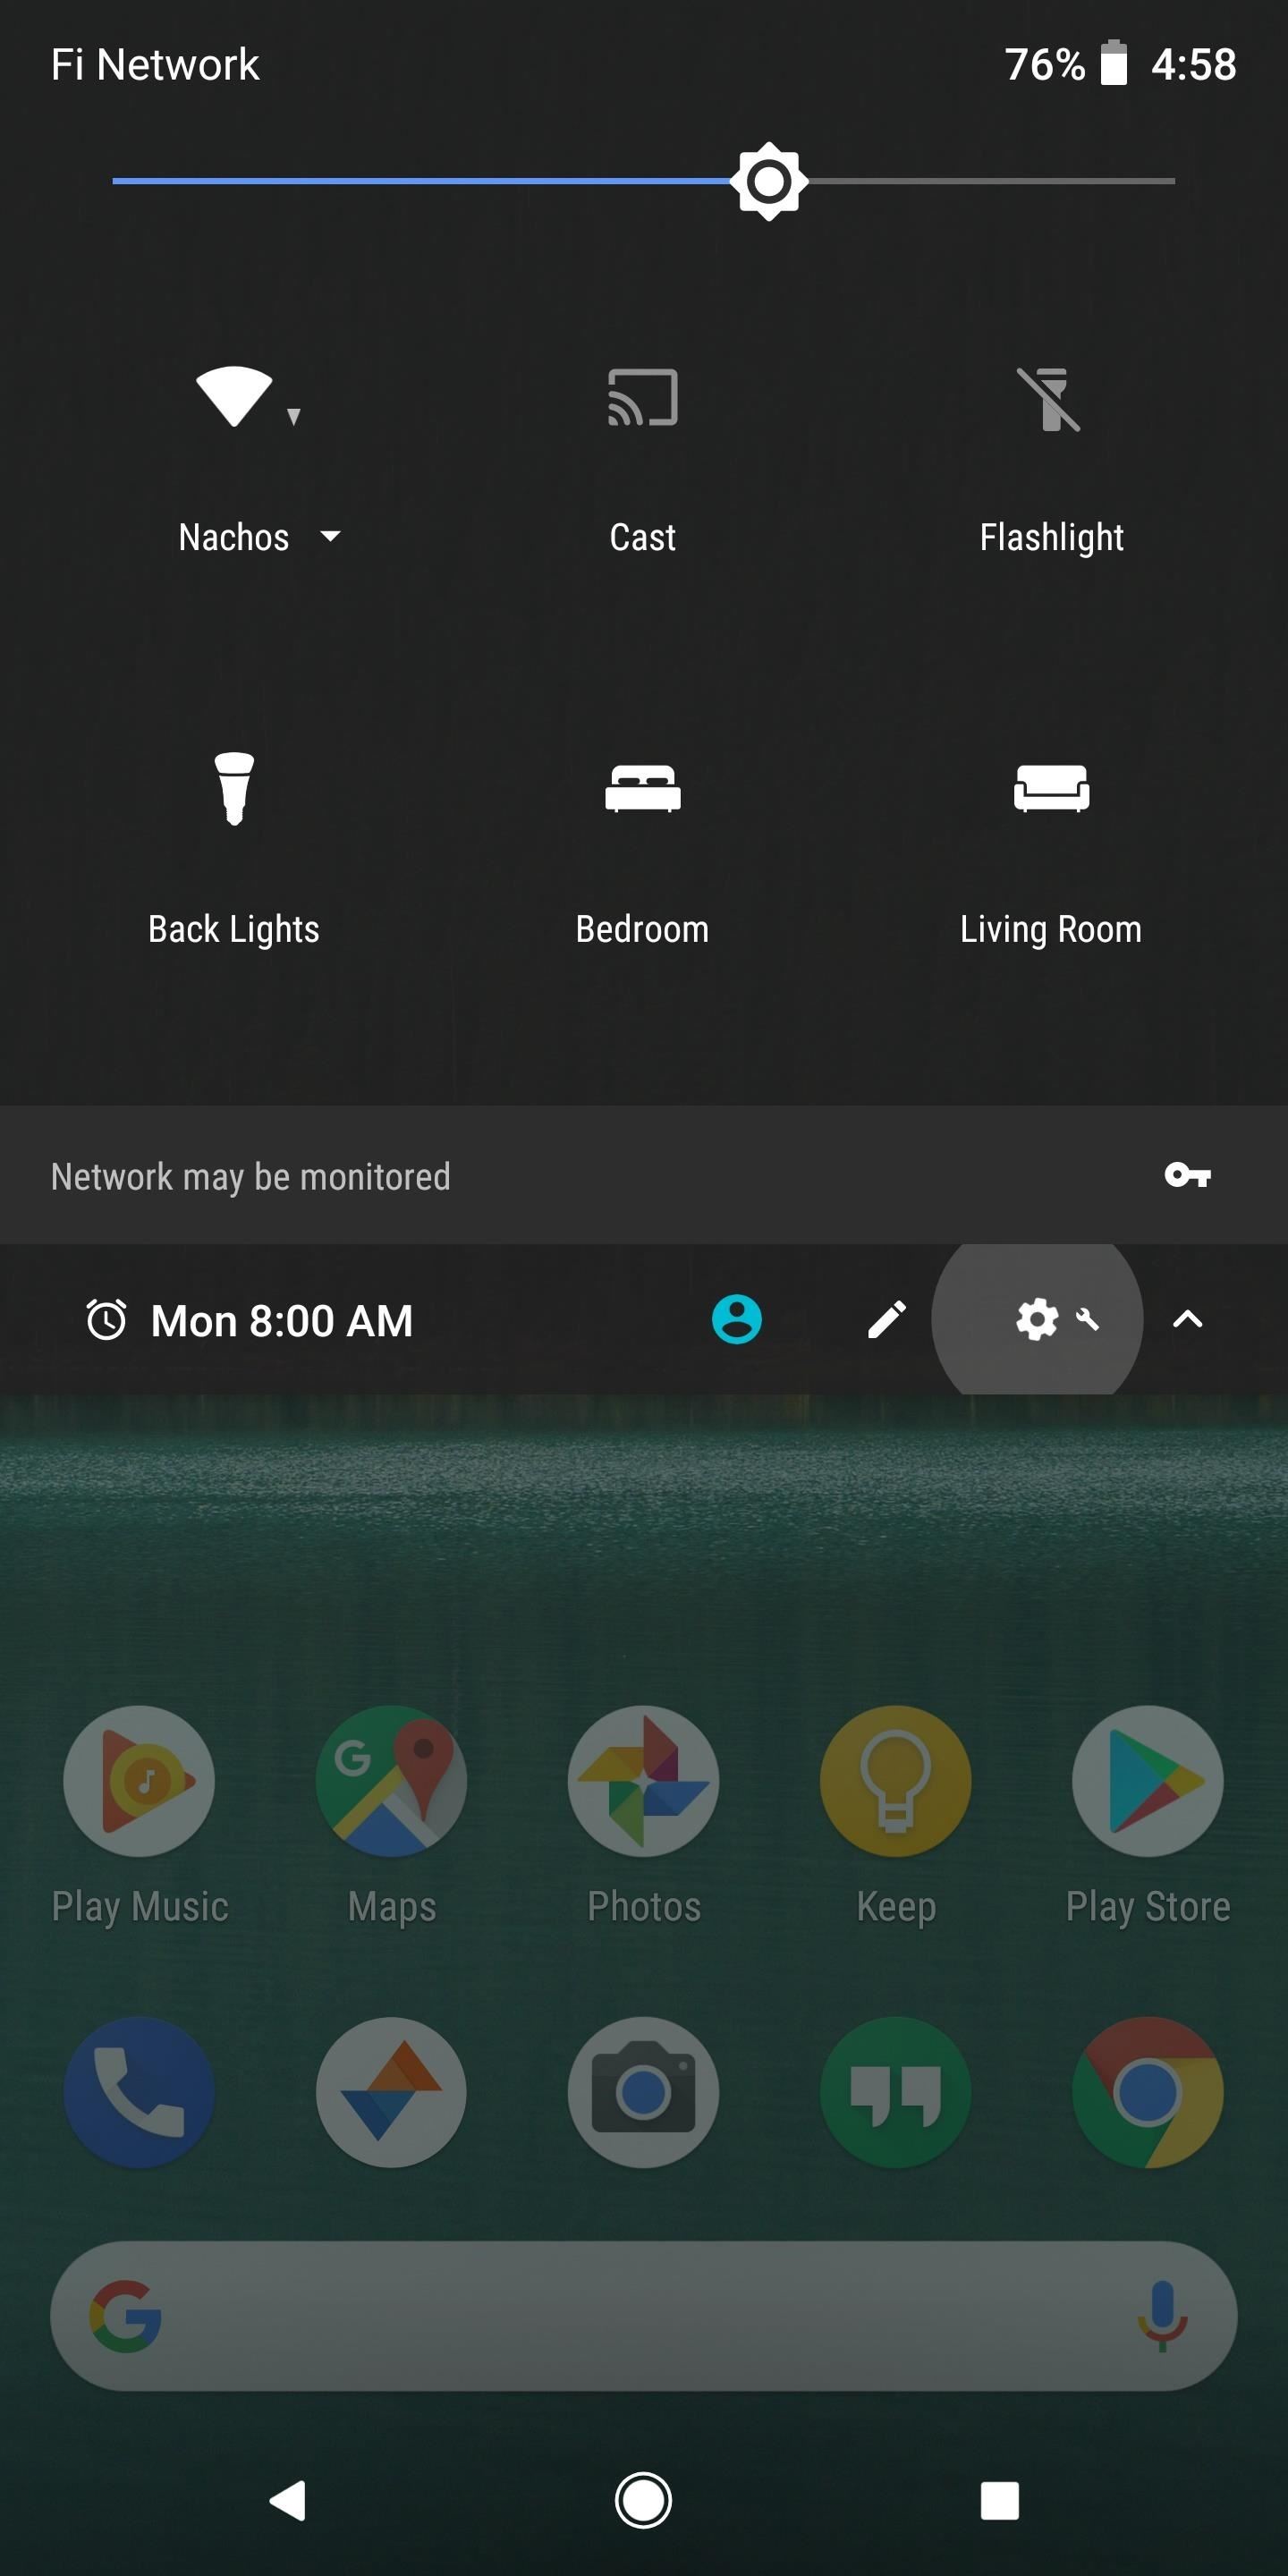
9. Hide Status Bar IconsAside from Developer Options, there's another useful menu that's hidden away. This one's called System UI Tuner, and it lets you adjust certain elements of the OS. To unlock it, enable Developer Options, then fully expand your Quick Settings menu. From there, press and hold the gear icon for 5 seconds. When you let go, you should see a toast message stating "System UI Tuner Unlocked." Note that some OEMs disable this feature, however. To use the feature you just unlocked, head to Settings –> System –> System UI Tuner. From there, select one of the options. The most useful one is "Status Bar" — this will let you enable or disable several icons that appear in your status bar.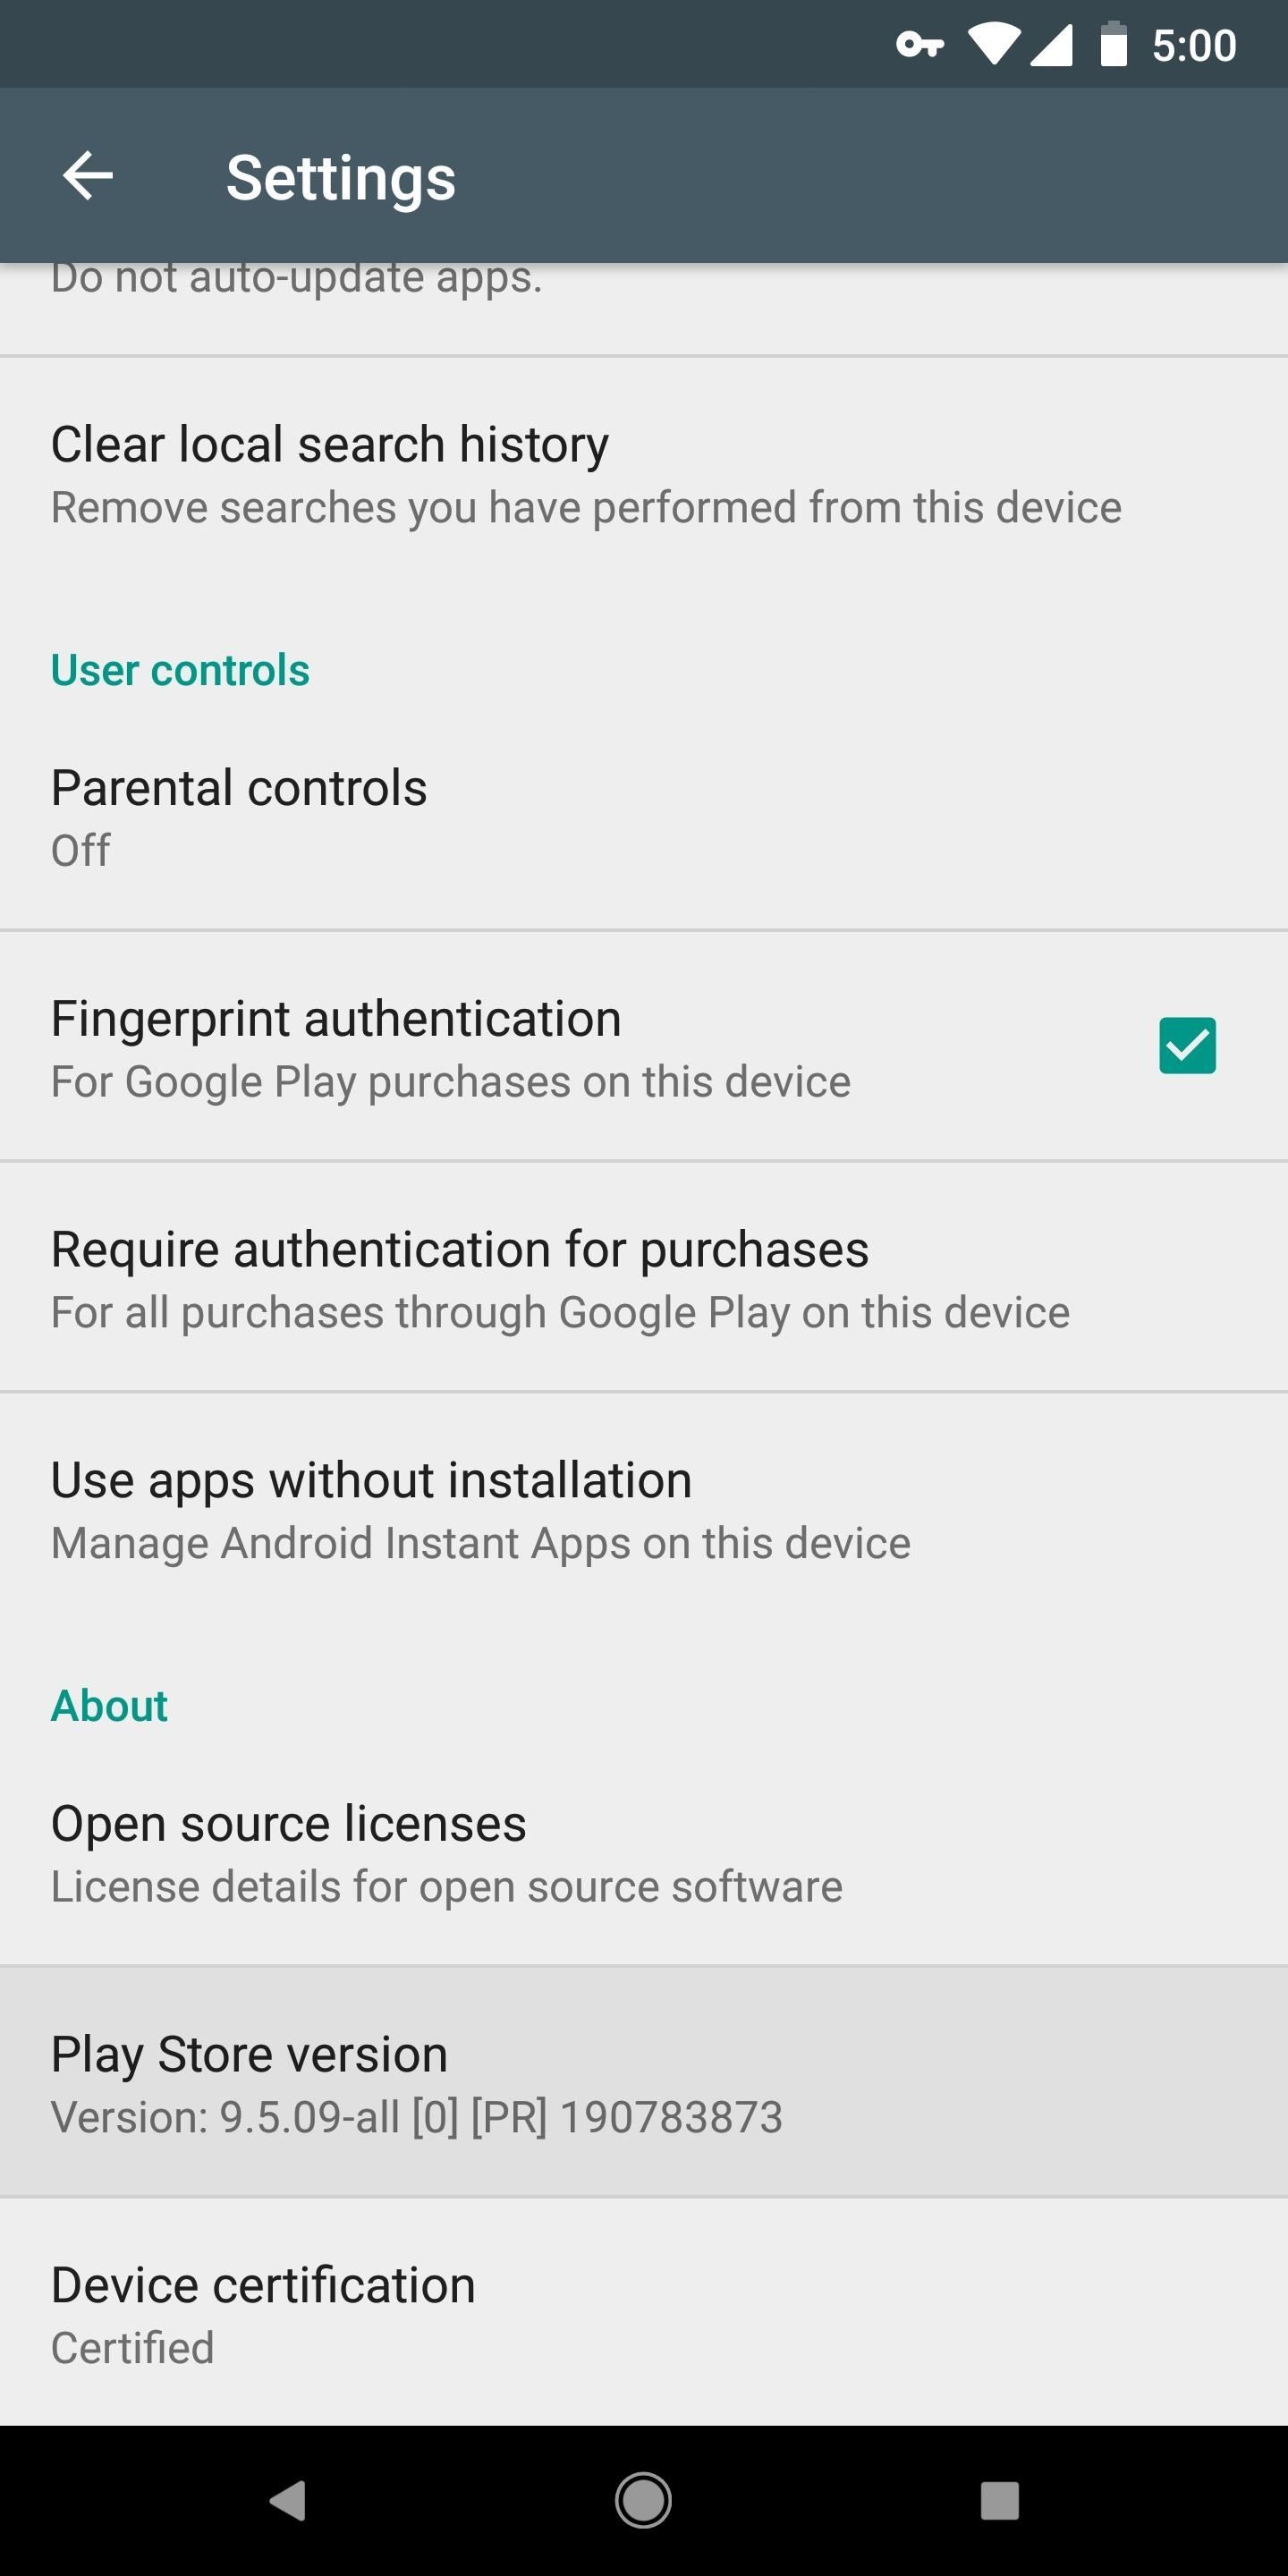
10. Force the Play Store to UpdateGoogle periodically rolls out updates to the Play Store like the recent redesign that changed how apps appear. However, they do this silently, meaning you won't know when the Play Store is updated. Another drawback to this approach is the updated Play Store won't always hit your device right away, even if it's ready.To manually check for an update to the Play Store app, open the app and head to its side navigation menu. From there, select "Settings," then scroll down and tap "Play Store Version." While it looks like a simple list item, this is actually a button that forces the Play Store app to check for a new version.
11. Enter Safe ModeWith all the malware out there, there are times when you might need to disable some of the third-party apps on your phone. This is what Safe Mode is for — booting into this mode will prevent third-party apps from running, allowing you to find and disable any potential malware threats while they're neutralized.To enter Safe Mode, long press your power button to bring up the power menu. From there, long-press the "Power off" option, then press "OK" when asked if you'd like to enter Safe Mode. When you're done with Safe Mode, you can get back to normal mode by simply restarting your phone. Image via pushbulletusercontent.com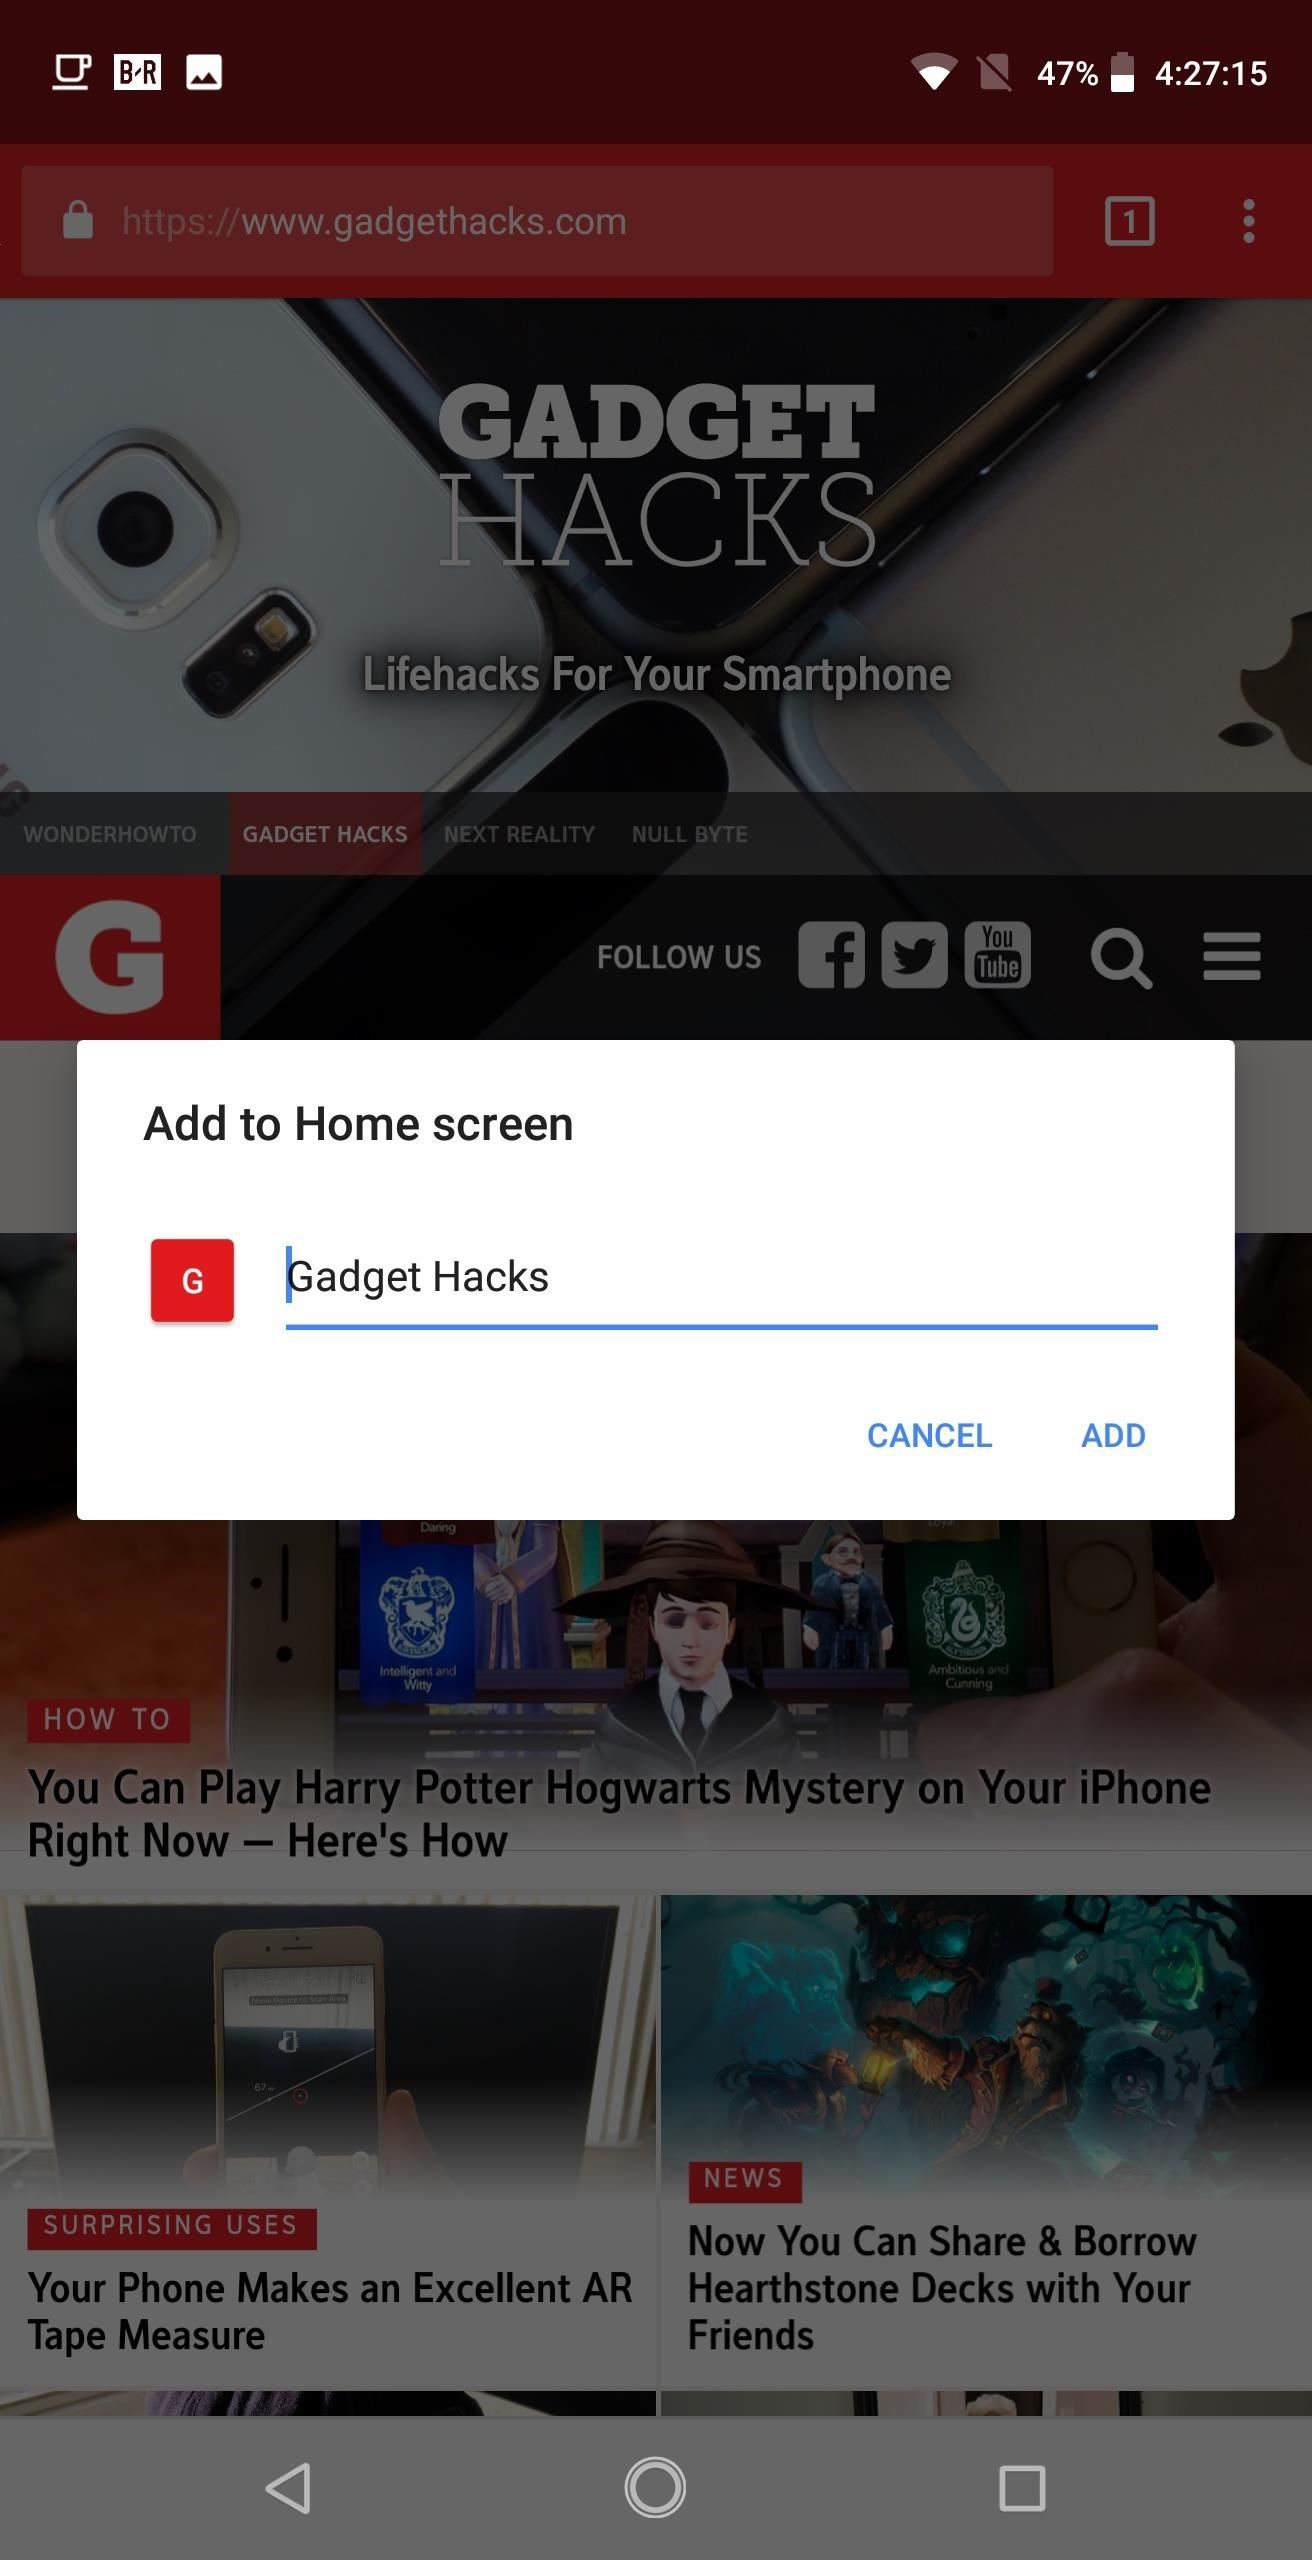
12. Use Websites Like AppsWhile the Play Store has over 3.5 million apps, there are some websites that still haven't created an app for their users. Luckily, there's a way to transform some of your favorite websites into an app-like experience and it only requires the use of Chrome.Chrome supports a feature known as Progressive Web Apps (PWA). These are web applications which are web pages that operate similarly to mobile applications. These apps can be saved to the home screen for easier access, are designed for small touchscreen operation, and include animations and layouts common among mobile applications. However, this tool requires the web developers to build in support, which means PWA won't work with all websites.To try it, open Google Chrome and visit a website. Once the page loaded, tap the menu button and choose "Add to Home Screen." A popup will emerge which will let you change the name of the icon and inform you if the website supports PWA. Websites that support the feature will display the icon of the website, while those which don't will display the first letter of the website's name. While you can still add the latter to your home screen, it will operate as a web link which will open up Chrome to the website. However, a PWA will operate without opening the browser, performing similarly to apps on the Play Store. PWAs require the browser that was used to create them to remain on your phone. Therefore, if you ever uninstall Chrome, you will lose your PWA. Firefox for Android also supports the feature. Check the link below for a tutorial on how to use PWAs on our winner for the best browser on Android.Don't Miss: How to Turn Websites Into Apps Using Firefox for Android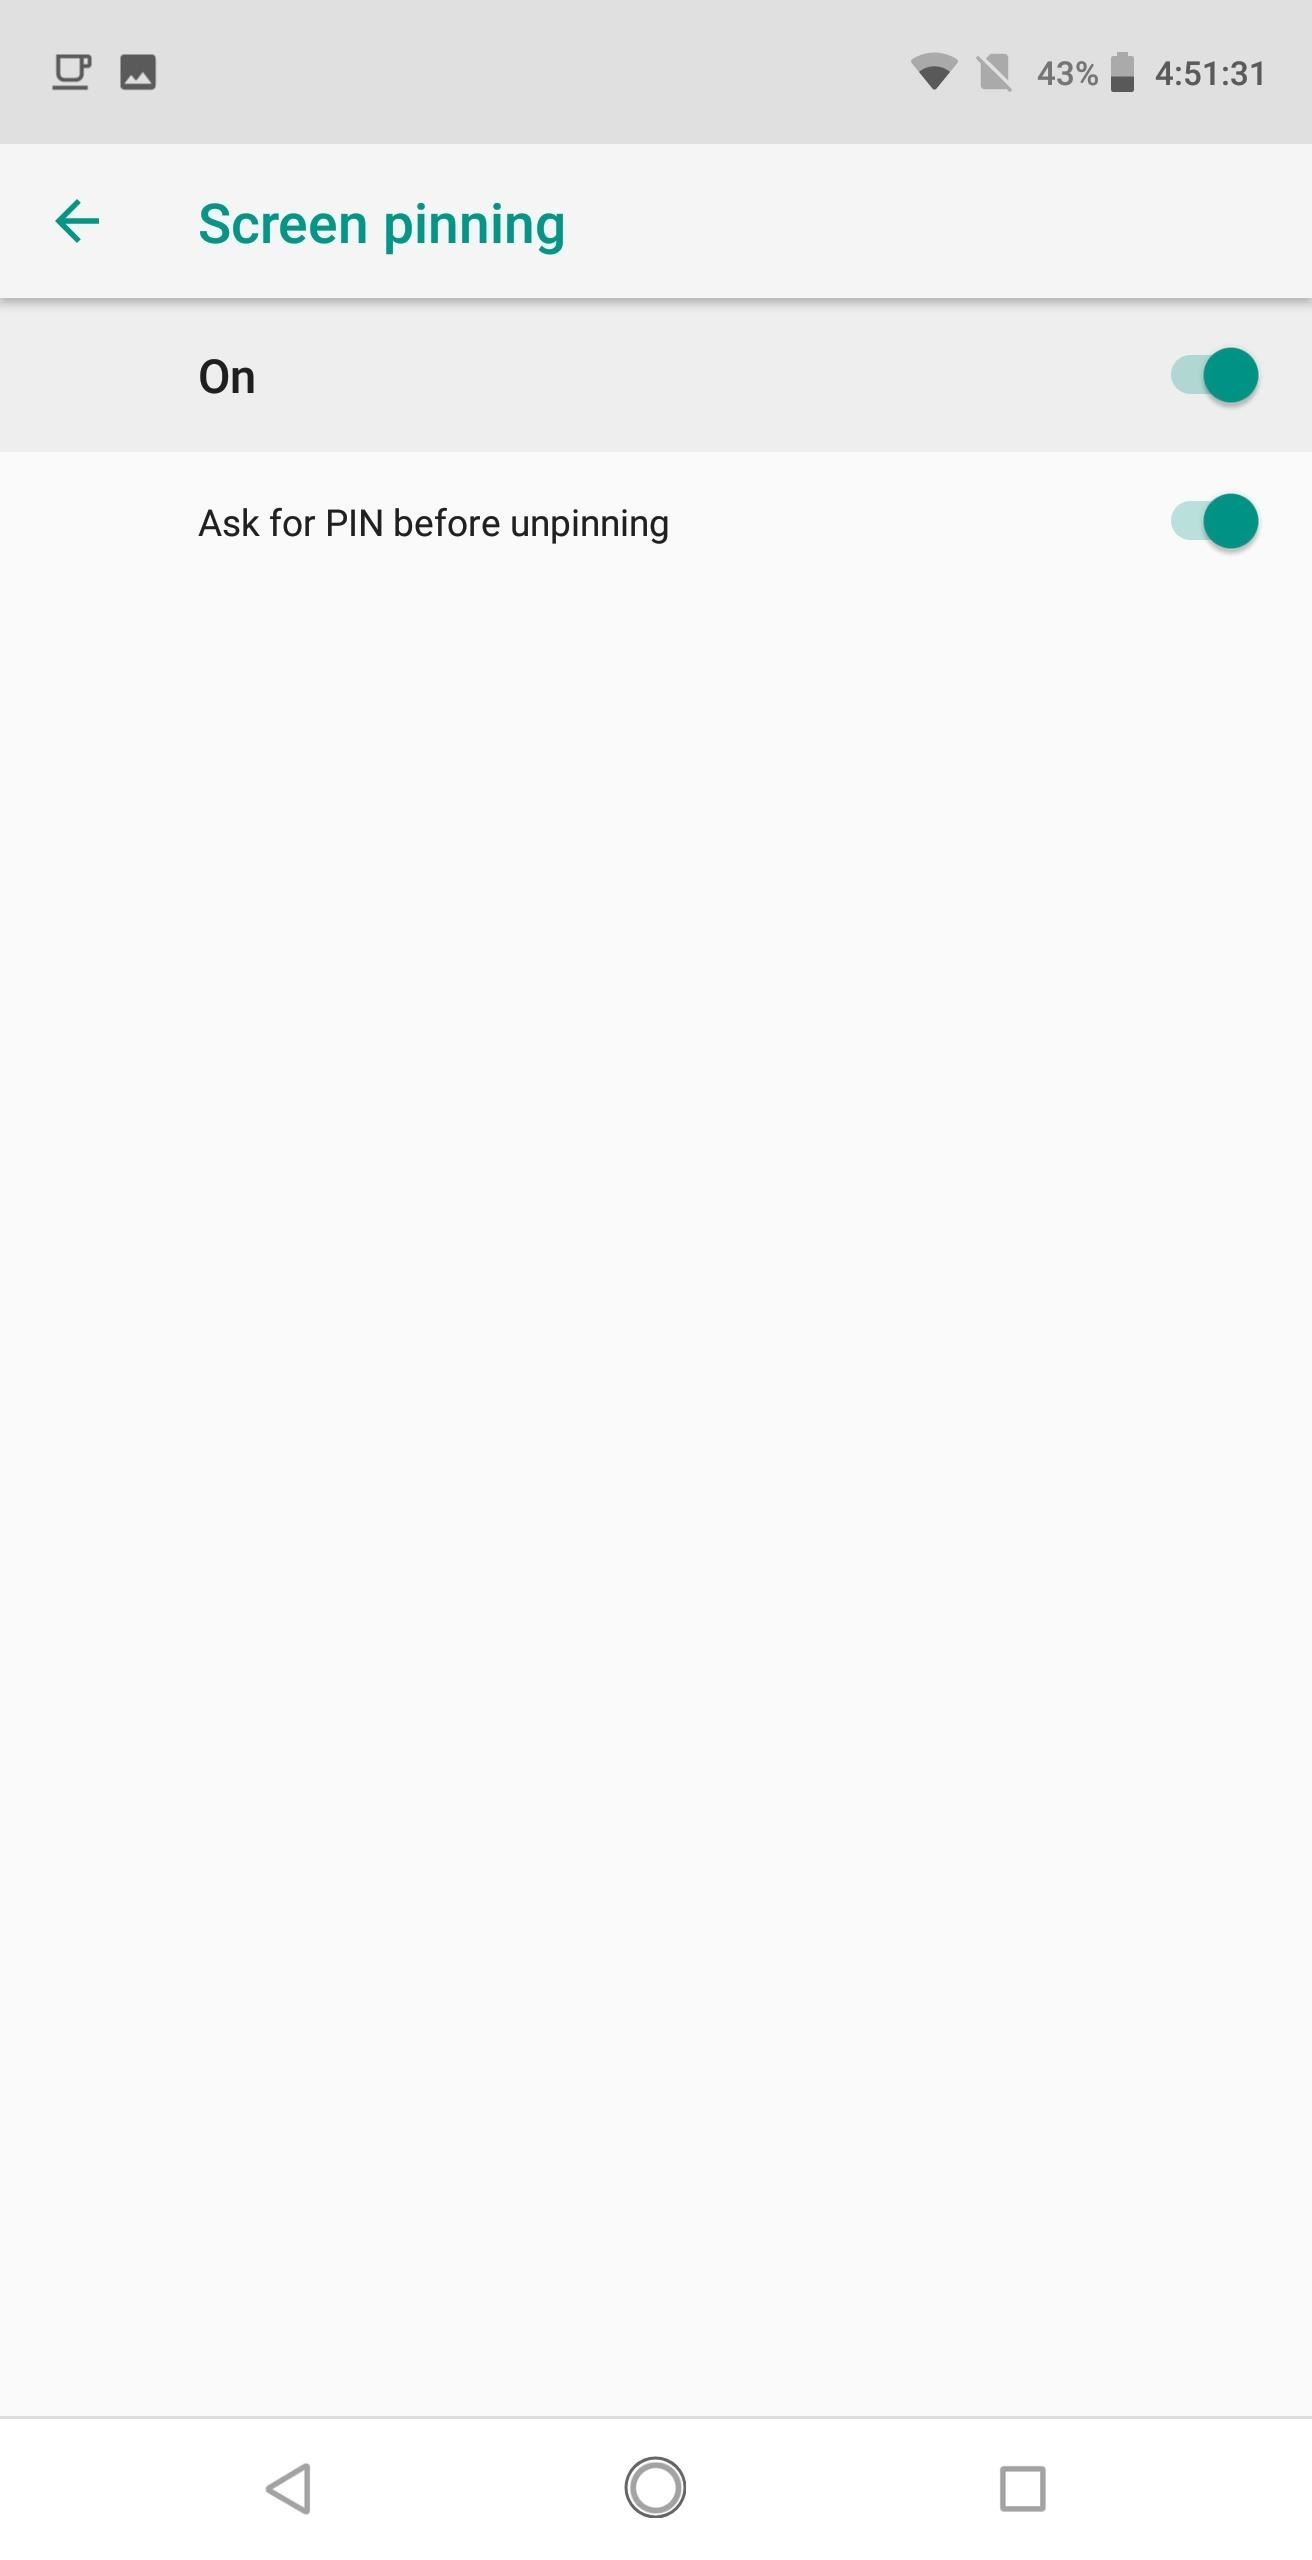
13. Lock an App in the ForegroundWhen someone asks to borrow your phone, you might be worried that they'll go poking around in places they shouldn't see. Thankfully, Android Lollipop added a great feature that will prevent someone from leaving the current app unless they have your PIN.To try it out, open Settings and choose "Security." Select "Screen pinning" and enable the feature. Additionally, enable the "Ask for PIN before unpinning" toggle if it isn't already enabled. Now open the app that you want to lock in place and tap the recent apps button (the square icon in your navigation bar). Scroll up until you can see the bottom of that app's card in the multitasking view, then tap the pin icon. Pinning an app makes it to where the person using your phone can only use that app. However, be aware that the user can still navigate through that entire app and its menus. For example, if you pin the phone app, they can explore anything contained within the app, such as voicemails, contacts, and call history.To undo the screen pin, press the back and recent apps buttons at the same time, which will send you to the lock screen and require your PIN or fingerprint.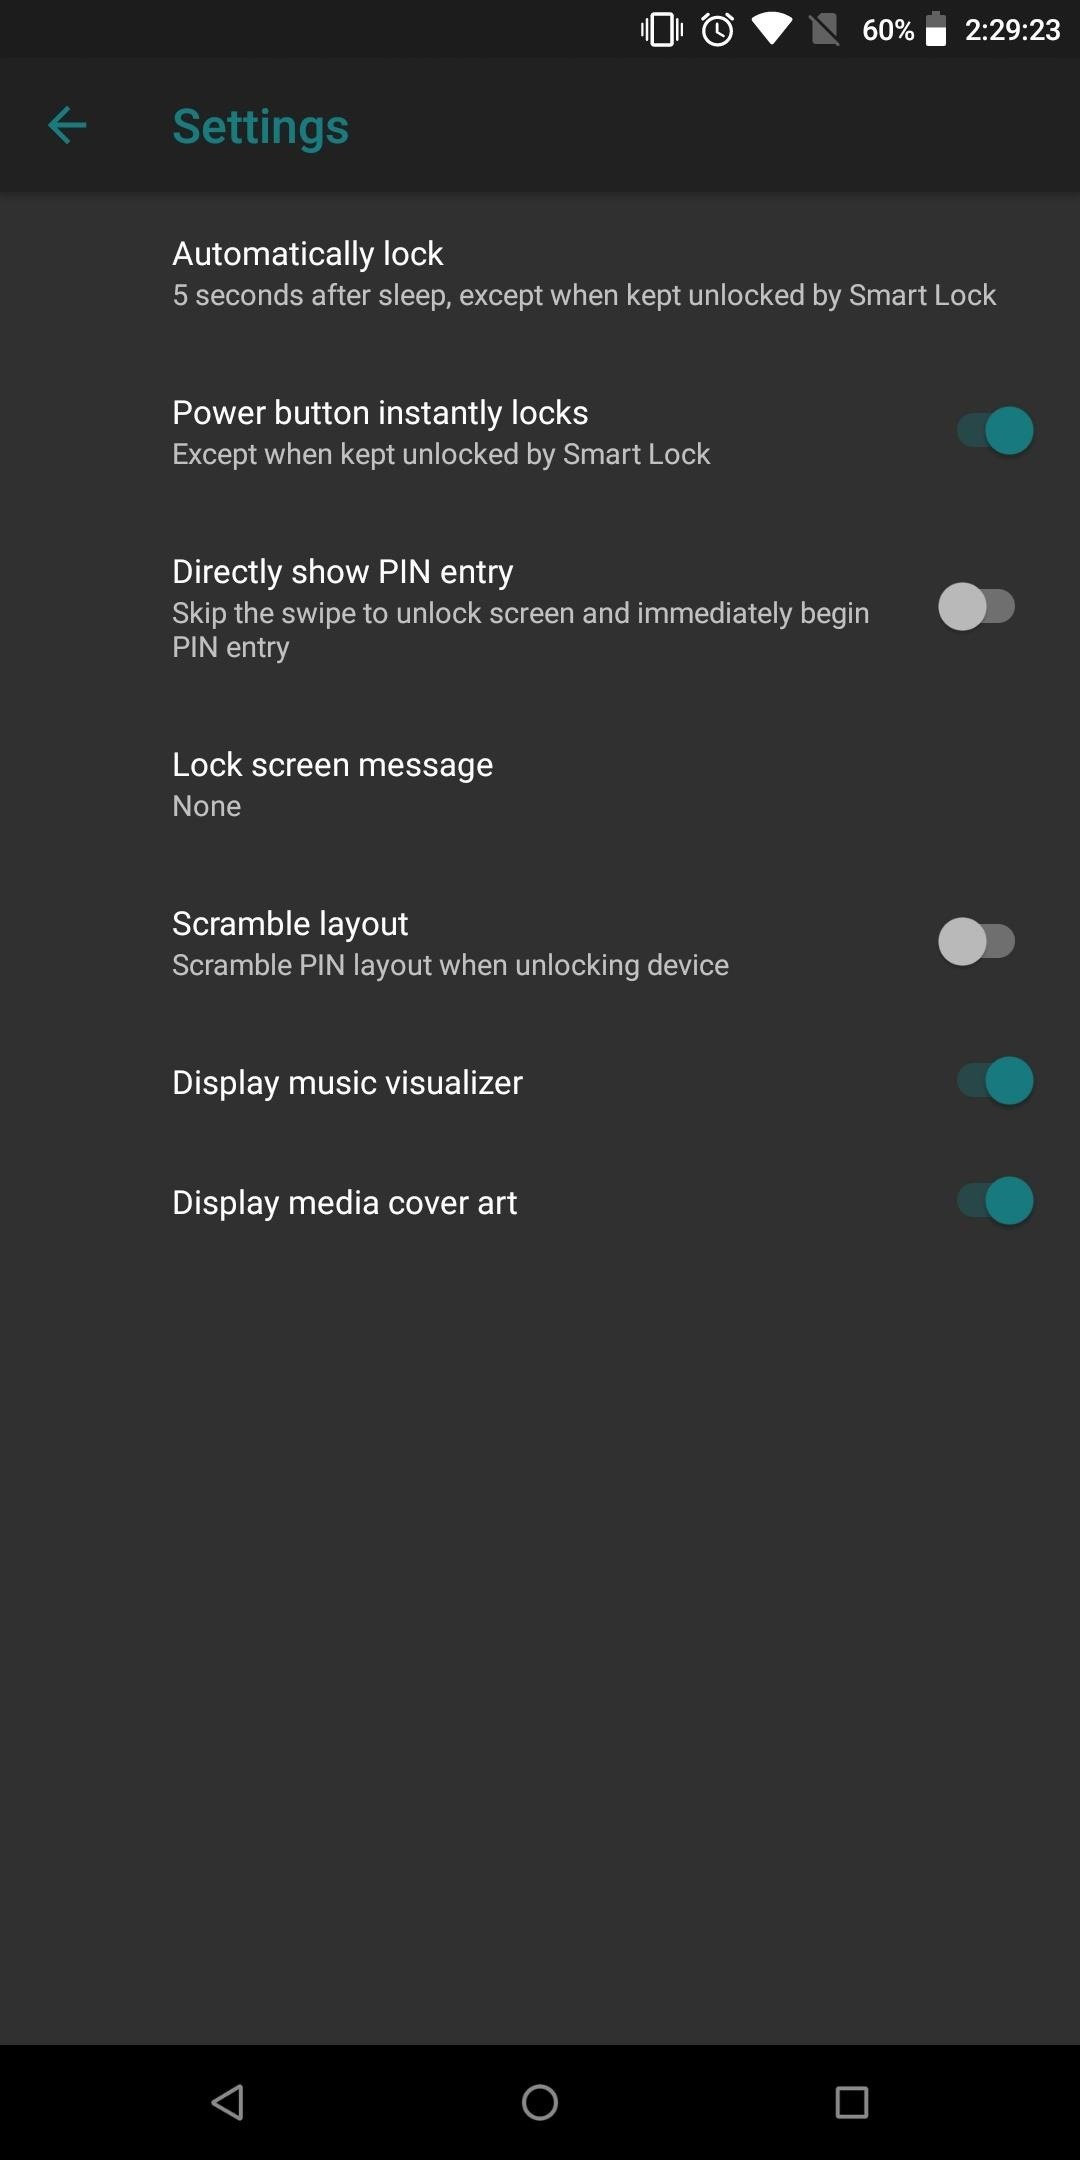
14. Delay or Shorten Auto LockAfter your screen times out, Android waits a few seconds before it locks your device. If you wish, you can modify this time to either be longer or shorter. Enter Settings and choose "Security." Next to the "Screen Lock" option should be a gear icon. Tap this icon, then select "Automatically lock." Using the pop-up menu, adjust the time period between when you phone display goes to sleep and when it turns on the lock screen.By default, the screen will lock after 5 seconds. If you want to increase your security, change the value to "Immediately." However, if you wish to delay it, choose any time longer than the default value. Additionally, for those who wish for further delay, disable "Power button instantly locks" to prevent your phone from locking when you turn off the screen with the power button.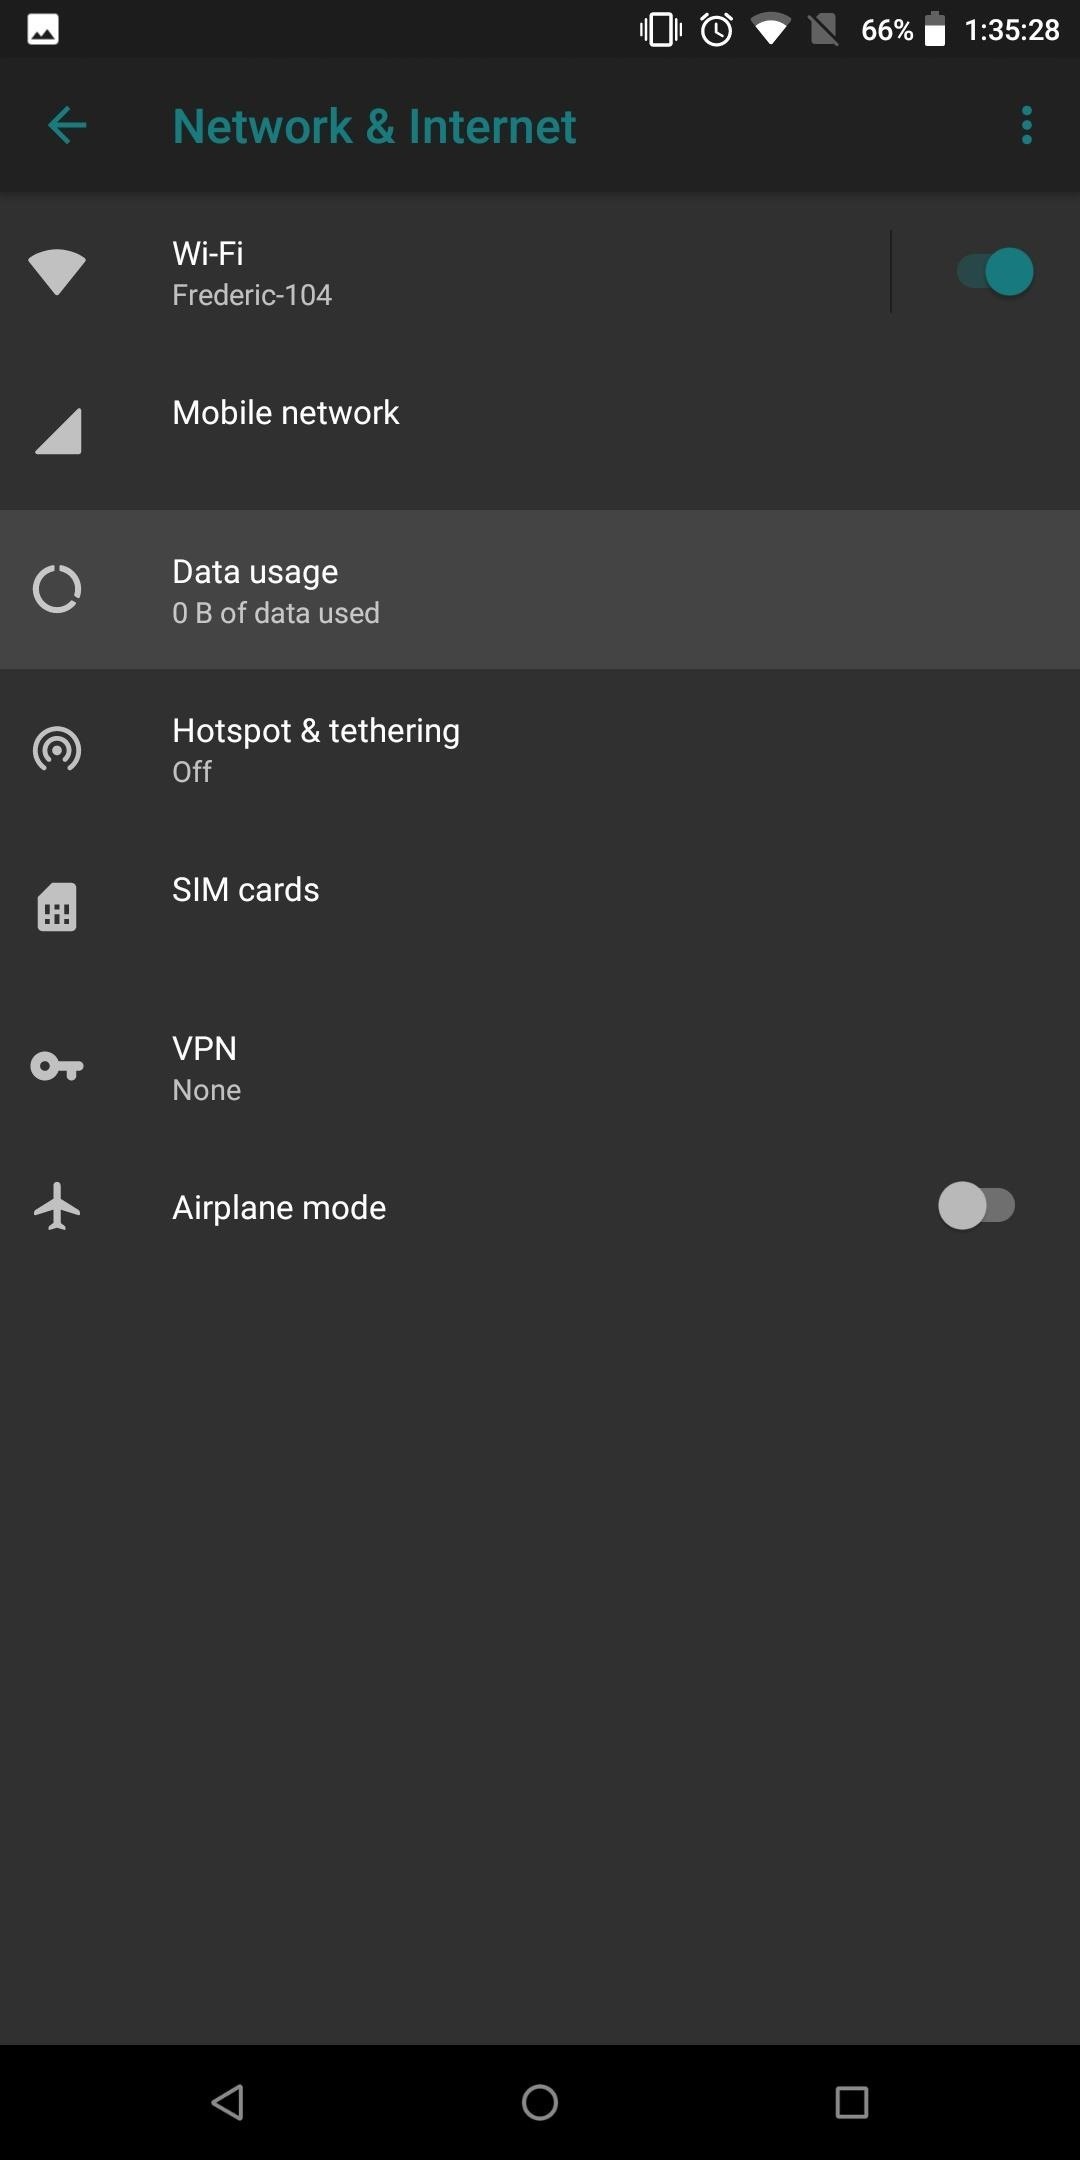
15. Manage Your Data UsageUnfortunately, many of us are tied to limited data plans as wireless carriers slowly move away from truly unlimited data. While carriers do provide some data management tools, such as text message reminders when nearing your limit, Android offers even greater control.Open Settings and choose "Network & Internet", then select "Data usage." Under this option are several tools which will assist you in managing your data so you don't exceed your limit each month. Under the grouping Usage is a graph representation of the percentage you've currently used. If this percentage is higher, you can limit all background data by choosing "Data saver" and opting to turn it on. Under the grouping Mobile, you can turn off your cellular data by selecting the toggle "Mobile data." You can view what apps are using the most data by selecting "Mobile data usage." Selecting an app on this list opens up additional controls such as disabling background data for individual apps or allowing the app unrestricted data usage while "Data saver" is enabled.You can ensure your mobile data usage chart is accurate by having it restart each month on the same day as your billing cycle. By default, Android will simply choose a day. However, you can change this by selecting "Billing cycle", then "Billing cycle" again to change it to the proper day. Under the "Data usage" menu, you can also issue an alert when your data is close to running out. However, if you truly don't want to exceed your data, you can also set a data limit by selecting "Set data limit." When enabled, Android will turn off data automatically when you reach a certain usage threshold.With these tips, you've now gained additional control of your Android device. For those who wish for even more control, or believe these controls are too complex, check out the link below for additional tips to improve your workflow and get around Android easier.Don't Miss: 27 Cool Little Feature in Android You Might Know AboutFollow Gadget Hacks on Facebook, Twitter, YouTube, and Flipboard Follow WonderHowTo on Facebook, Twitter, Pinterest, and Flipboard
Cover image and screenshots by Jon Knight/Gadget Hacks
Stories you create and share on Instagram are automatically saved in your Stories Archive, so there's no need to save them to your phone. You can turn off Stories Archive at any time in Settings.
How to Add Song Lyrics to Playing Music in Your Instagram
You can view and manage your Location History information through Google Maps Timeline, which is available to both mobile and desktop users. In Timeline, you can edit specific entries from your Location History, delete information from ranges in time or delete all of your Location History data. Your Timeline is private, so only you can see it.
How to Create a Custom Travel Map with Google Maps {New
Move the Obtrusive Volume Indicator Popup Box into Your iPhone's Status Bar [How-To] I will show you how to relocate that huge volume popup box to the status bar so it won't intrude on any
How to Hide the Annoying Home Bar Indicator on Your iPhone X
You find and update all of your apps using the iOS App Store, and if you have updates scheduled automatically, it could be working hard on a daily basis. With all of that work, it can lose its footing from time to time and cause things not to work as they should.
Why Is My iPhone App Store Not Working Or Blank? Here's The Fix!
Hi, this video shows you how to view your Android mobile cell phone on a LG Television using Screen Share. It is easy and quick to do. This feature is useful if you want to share your photos and
How to Watch Cell Phone Videos on Your Television | It Still
Firefox is my browser of choice. However, one thing I think they could improve on is their default behavior for file downloads. Unlike IE which prompts you for the location to save downloads, by
Change File Download Locations in Chrome, Firefox, Opera, IE
The OnePlus 5 had been in the hands of the public for a meager twenty hours before developers on XDA released a custom recovery image for it, and the 5T had a similar trajectory.
How to Install TWRP Recovery on Your OnePlus 6T
If you're new to iOS 12, here's the best the iPhone operating system has to offer. Check out the 11 most useful features in iOS 12. thanks to an integration with Apple News.
12 More Cool New iOS 13 Features Apple Glossed Over at WWDC
How to Get Free Wi-Fi on All of Your Mobile Devices with
How to put your iPhone or iPad into DFU mode | iMore
How To: Pimp your toy helicopter with a spy camera How To: Fly a RC helicopter using cyclic and rudder controls How To: Understand how helicopters work How To: Hack a Brother KH-930e knitting machine to receive any digital pattern
How to Keep the ground crew safe around helicopter loads
How To : Facebook Undo Gives You 5 Seconds to Think About What You're Actually Posting While it's currently impossible to go back in time, there is something wonderful about being able to undo the stupid stuff that you just did.
Fix your facebook post settings. « FarmVille :: WonderHowTo
If you add a note and then send a reply, a box will pop up asking if you want to send the notes with your email message: The notes are saved directly to Gmail's servers, making them visible to anyone who receives your message—if you choose to include them: Sticky Notes for Your Gmail. If emails are like letters, Gmail Notes are like sticky
How to add notes in gmail - QueHow
10 Awesome Android Apps You Won't Find on Google Play
When you're using Google Maps on your BlackBerry the default view is map view. Ahh, but it doesn't have to be that way. If you'd like to get a feel for the terrain or the countryside, it's easy-to-do.
Google Maps on BlackBerry | CrackBerry.com
0 comments:
Post a Comment