How To: Install Android Q Beta on Your Essential Phone
Like last year's beta release of Android Pie, Google has allowed the Android Q Developer Previews to support some non-Pixel devices. Announced at Google I/O 2019, there are 15 non-Pixel smartphones eligible for the Android 10 Beta, including 2017's Essential PH-1.With a few steps, you can enjoy the latest version of Android once again on your Essential Phone before it officially unveils in late-summer, early-fall. It comes as no surprise that Google includes Essential in the Android Q Beta. Not only is Essential run by Android co-founder Audy Rubin, but Essential Phone is one of the few devices to run stock Android.While Essential does include instructions on its website for installing the Android Q Beta, I ran into some issues, and there's a good chance you will too. Therefore, after some trial and error, I've laid out the three easiest ways to install the beta below, including the over-the-air update, manually without a custom recovery, and manually with a custom recovery.
Option 1: Over-the-Air (OTA)By far, the easiest method to get Android Q Beta on your Essential Phone is with the OTA update, which lets you install Android Q the same way you would any official software update pushed out by Essential. However, before you check "About Phone," you need to sign up for the beta first.It's a requirement to give access to only those that know it's unstable software and that data will be collected to uncover bugs and other issues that will help with the continued development of the stable release. To sign up, simply install the Essential Q Beta app from the Play Store.Play Store Link: Essential Q Beta (free) Once installed, open the app and select "Enable Phone Access" so that it can retrieve your device's serial number. Then, input the requested information, which includes your email address and first and last name. Once filled in, select the button at the bottom. The next page will state that once your information is confirmed, you will receive the update over the air. With a little bit of patience, you will get a notification for a new software update which you can select to download and install Android Q Beta on your Essential.
Option 2: Without a Custom RecoveryWith a custom recovery, this process is super easy to get Android Q Beta installed manually, nearly identical to updating a rooted phone with the latest security patch. However, since a lot of you are probably not running modified software, we'll first show the manual process if you're running unmodified software on Essential PH-1.
Step 1: Download ADB & Fastboot on Your PCTo install the Essential Q Beta manually, you'll need to use ADB commands. ADB commands are commands you send from a computer to your Android phone to perform tasks not available within the software. You'll also need Fastboot.While there are multiple ways to add these programs to your computer, we believe the best method is to install Google's official SDK Platform Tools. This method has proven to be the most reliable across different computers and devices.Instructions: How to Install ADB & Fastboot on Mac, Linux & Windows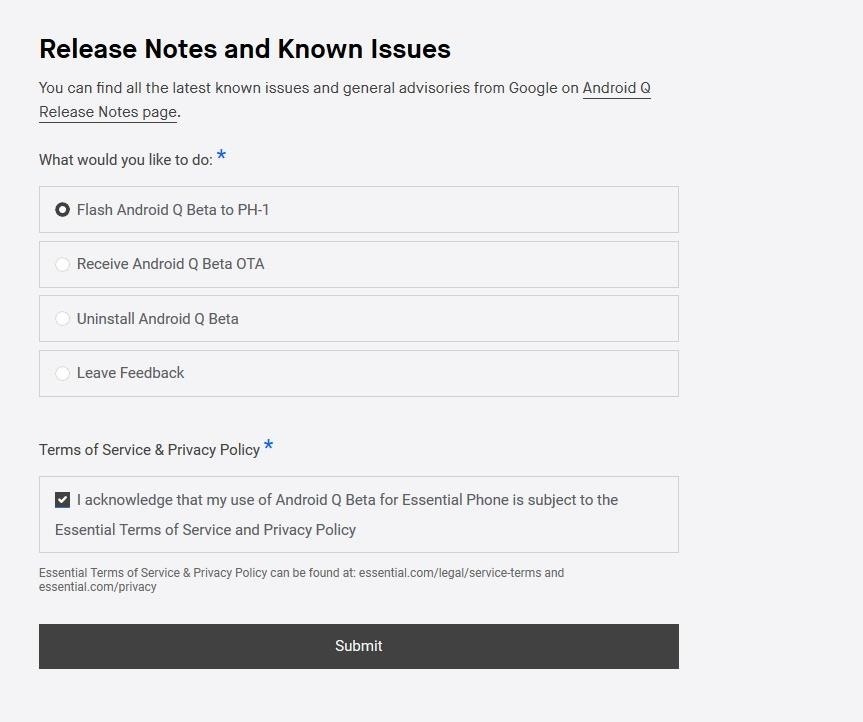
Step 2: Download the OTA FileOn your computer, visit Essential's Android Q Beta Program webpage. At the bottom of the page, you'll be presented with four options. Choose "Flash Android Q Beta to PH-1," and check the checkbox below acknowledging its usage. Select "Submit" to bring up a new page with links to for the files.Link: Essential's Android Q Beta Program On the next page, choose the version labeled "Download (OTA)." Once downloaded, move the ZIP file to the platform-tools folder inside of your ADB installation directory. For Windows users, you'll find this folder here: C:\Program Files (x86)\Android\android-sdk\platform-tools However, if you decided to use the minimal ADB installer, the folder will be in a different location. If you're unsure of the folder's location, or if you're on a Mac or Linux machine, use your computer's search function to find the platform-tools_ folder.After you've copied the ZIP file into the platform-tools folder, keep the window open, as you will need it for the next step.
Step 3: Open a Command Prompt or Terminal WindowOpen a Command Prompt or Terminal window. For Windows, press the Windows button on your keyboard, type in "cmd," and hit Enter. On a Mac or Linux computer, open it up from the folder with all your applications or via another way, such as Spotlight on a Mac or a shortcut in the dock.In the Command Prompt or Terminal window, input the following code, replacing "location" with the location of your platform-tools folder. On a Windows machine, you can copy the location from the address bar at the top of the File Manager window. Otherwise, on Windows, Mac, and Linux, you can just drag and drop the folder into the terminal after cd with a space after it. cd location The cd command will redirect the command prompt or terminal to that directory, allowing you to access its files. Only with this redirect can you start to use ADB and fastboot commands. No matter which operating system you are using, leave the Command Prompt or Terminal open, as you will need it for most of the steps below.
Step 4: Unlock the BootloaderThe next step is to unlock the bootloader of the Essential PH-1. We've already laid out this process in our guide on unlocking the Essential Phone's bootloader, so make sure to check that out. We include a lot of details, breaking down each step to avoid any issues. Also, be aware that this process will reset your phone, so make sure you back up all your data.Instructions: How to Unlock the Bootloader on the Essential PH-1 Starting with Android 9.0, your backup files are protected by the lock screen passcode. Therefore, make sure you can remember your old passcode, in case you switch it after restoring your phone.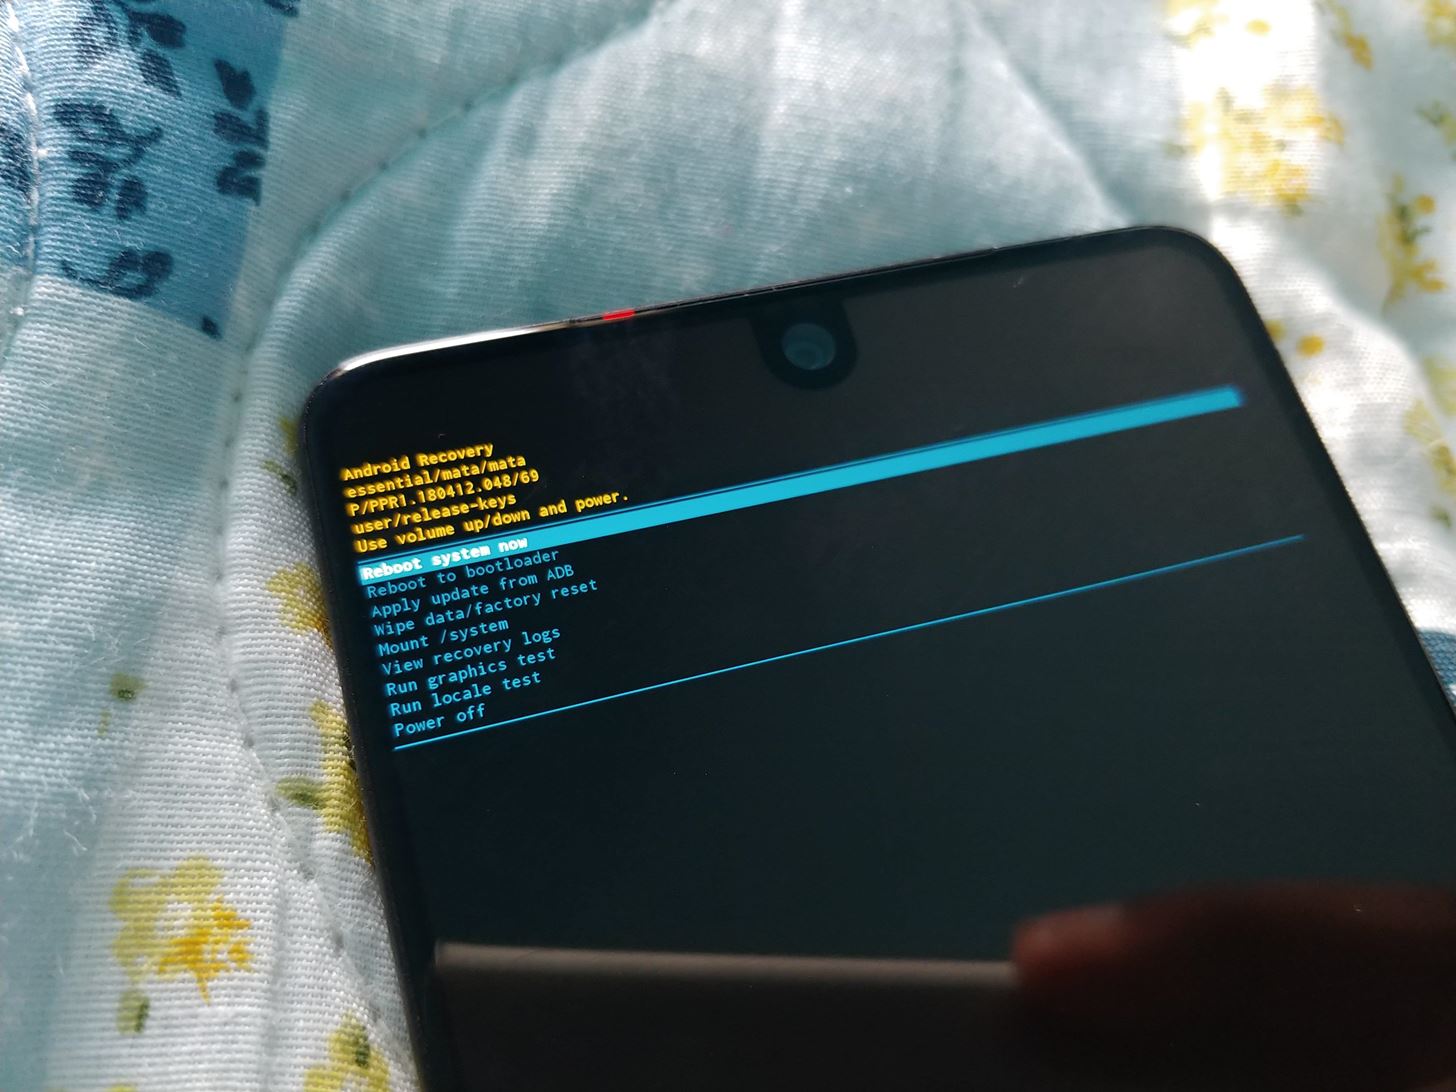
Step 5: Install the Android Q BetaOnce your phone reboots and brings you to the initial start screen, verify that ADB commands can still be sent by inputting the following command into Command Prompt on Windows. adb reboot recovery For Mac and Linux users, you 'll need to put ./ before the command. Therefore, it will look like this instead: ./adb reboot recovery You'll be presented with a new screen on the phone with Android's mascot lying down. Hold the Power button and tap Volume Up to see the recovery menu options. Using the Volume buttons to navigate, highlight "Apply update from ADB," and confirm by pressing the Power button. Image by Jon Knight/Gadget Hacks Two lines of text will appear confirming your device is ready to accept sideloaded firmware. Back on your computer, type the following in a Command Prompt and include a space at the end. Do not press enter yet. adb sideload On Mac and Linux, type the following into the Terminal, also including the space at the end. Do not press enter yet. ./adb sideload Drag-and-drop the OTA.zip file you downloaded in Step 2 into the Command Prompt or Terminal window. This will populate the full file name and location saving you time and potential issue for typing it wrong. Before pressing Enter, make sure the command looks like this for Windows: adb sideload filelocation OTA.zip Or like this for Mac and Linux: ./adb sideload filelocation OTA.zip A percentage number will show up in the Command Prompt or Terminal window. Once it reaches 100 percent, restart your phone and your phone will reboot with Android 10 Beta installed.
Option 3: With a Custom RecoveryThere is another way to update to Android Q Beta which is much easier than Method 2 above. However, it does require you to have a custom recovery. A custom recovery is modified recovery which gives you extra functionality over your Essential PH-1. Tools such as TWRP let you back up your phone entirely (not just the apps and app data), root your phone with tools such as Magisk, run custom ROMs, and sideload OTA updates.If you haven't already, you should consider installing TWRP. It will make future Android Q Beta updates easier to install and will let you make full copies of your phone to return to if something goes wrong. We have a detailed guide on adding TWRP to your Essential Phone, so make sure to check that out.Instructions: How To Install TWRP Recovery on the Essential PH-1
Step 1: Download the OTA FileWith that out of the way, you'll need to visit Essential's Android Q Beta Program webpage on your computer. At the bottom of the page, you'll be presented with four options. Choose "Flash Android Q Beta to PH-1," and check the checkbox below acknowledging its usage. Select "Submit" to bring up a new page with links to for the files.Link: Essential's Android Q Beta Program On the next page, choose the version labeled "Download (OTA)."
Step 2: Download the TWRP FileSince installing Android Q Beta will wipe the device, you'll also lose the TWRP you already have. So, I recommend downloading the TWRP zip file as well. You need this file to keep your custom recovery after flashing the update. If you don't want a custom recovery anymore, by all means, skip this.Download the TWRP ZIP file from TWRP
Step 3: Transfer the OTA & TWRP FilesOnce the files are downloaded, use a USB cable to connect your phone to your computer. Remember, the included cable with the Essential Phone is USB Type-C on both ends, so if your computer doesn't have USB-C input, you'll need to get a USB-C to USB-A cable.Now, transfer the OTA file and the TWRP file to the "Downloads" folder on the Essential Phone. If you need help on this part, let me know in the comments. It's pretty easy on Windows. On a Mac, you'll need the Android File Transfer tool.If you run to any trouble, you can also visit the links in Step 1 and Step 2 directly on your Essential PH-1 to download the files without the need of a computer.
Step 4: Boot into Your Custom RecoveryHold the Power button until the power menu appears, then choose "Reboot." When you select "Reboot," hold down the Volume Down button on the side of the phone. After a few seconds, your phone will reboot to the bootloader menu. Using the Volume buttons to navigate, move to "Recovery mode," and press the Power button to confirm. Your phone will then restart again, this time into TWRP. Input your passcode to access TWRP.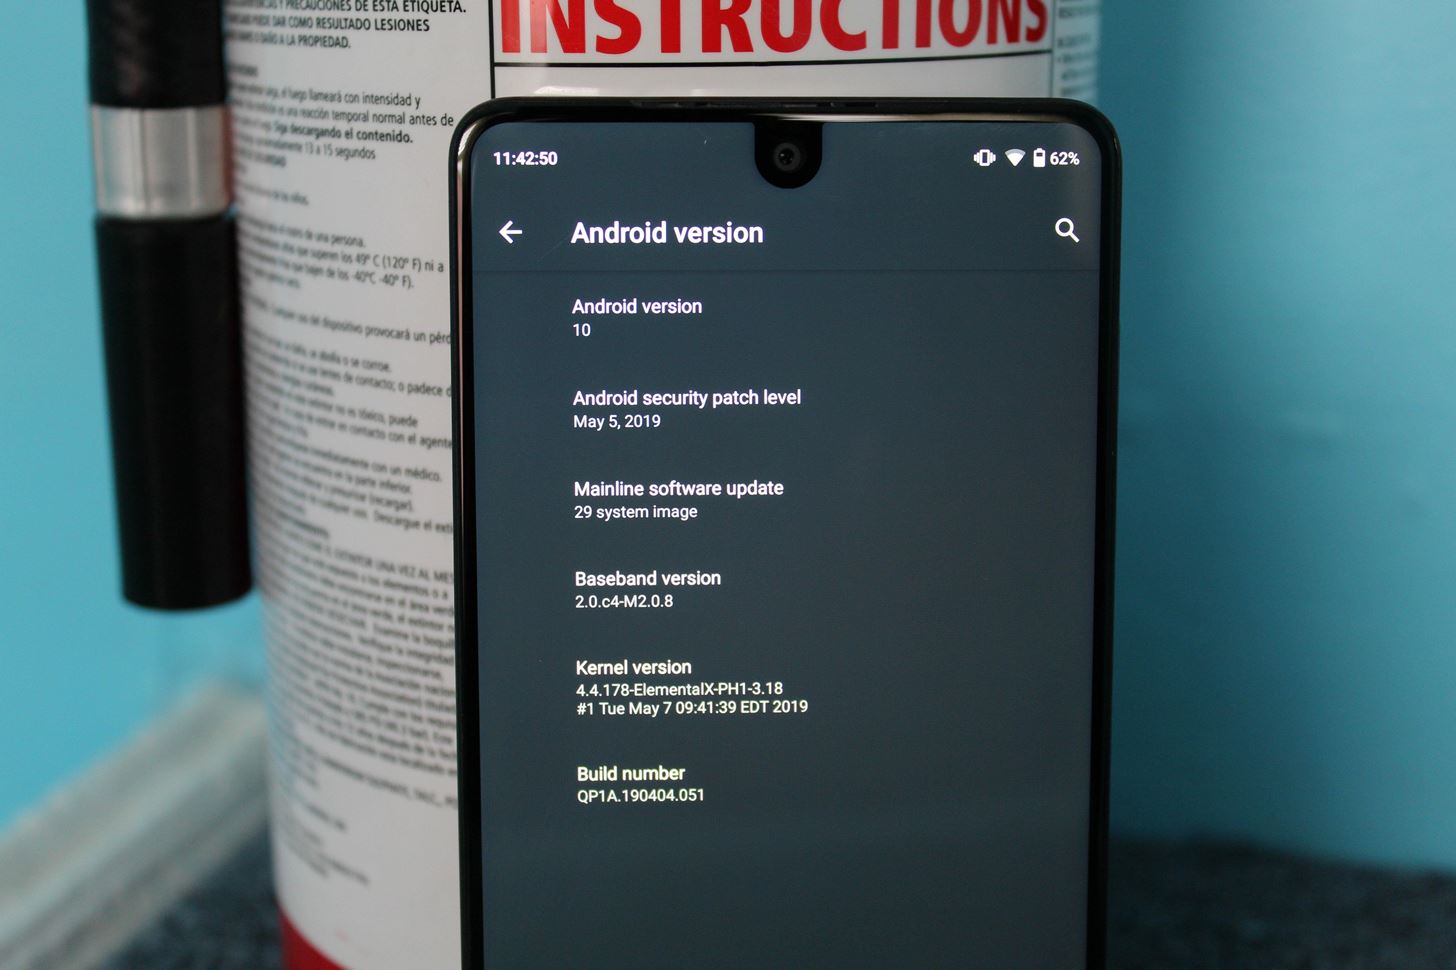
Step 5: Install the OTA FileFrom the TWRP menu, choose "Install." Find the OTA.zip file you place in the "Downloads" folder. Choose the file and swipe right on the bottom slider to install the ZIP file. Next, select the back button to return to the previous screen, then choose the TWRP installer ZIP file. Swipe right on the bottom slider to install this as well.Once both are installed, choose "Reboot System." Your phone will reboot, only this time, it will jump right into your newly installed Android Q system. Image by Jon Knight/Gadget Hacks From my testing, I found the latest Elemental X kernel works with Android Q. I also found that Magisk also works, meaning you don't have to give up root access as well. For how to add the custom kernel from Elemental X or Magisk, check out those links.Don't Miss: All the Cool New Features & Changes in Android Q 10Follow Gadget Hacks on Pinterest, Reddit, Twitter, YouTube, and Flipboard Sign up for Gadget Hacks' daily newsletter or weekly Android and iOS updates Follow WonderHowTo on Facebook, Twitter, Pinterest, and Flipboard
Cover image and screenshots by Jon Knight/Gadget Hacks
Please do. Such an ability is the basic tenet of a white-list strategy per user. This is going to be a mandatory concept for parents of young children who should only be dealing with a short list of certain websites (wixie.com for school projects, learning sites, etc.) I'll be investigating other 3rd party "net nanny" style utilities now.
NetNanny image search block. How to? - Experts Exchange
Text expansion shortcuts can also speed up typing, especially typing of the short messages, common phrases, and other repetitive things you type. But this solution can be used to speed up typing your email address in apps and your physical address on online web pages, too.
How To Type Faster Without Looking | HACK MY STUDY
The Music sticker is one of Instagram's best features. With it, you can add music directly to your story, incorporating a high-quality soundtrack to your favorite moments. On June 6, Instagram upped the ante on this feature, introducing live song lyrics that play throughout your story. Karaoke
6 Instagram Hacks for Better Instagram Stories : Social Media
How to Solder Stainless Steel: 7 Steps (with Pictures
Taser dear friends with hacked camera « Hacks, Mods
Android Keyboard Showdown: SwiftKey vs. Swype vs. Google vs. TouchPal vs. Fleksy What's New in iOS 8.3: Diverse Emojis, Password-Less Free Apps, Filtered Messages, & More How To: Get Rid of Emoji Suggestions in the New Version of Swype for Android
How to Get Emoji Suggestions with Any Android Keyboard
Use any of these clients with your torrent files to download content over the BitTorrent network. While these programs are free and legal to use, it doesn't mean the actual content you're downloading via the torrent is legally available in this way.
The battery percentage is not shown by default on Android Oreo or Pie, but you can enable this feature within seconds. This wikiHow will teach you how to show your battery percentage in the status bar so you can quickly see your battery usage at all times.
[Updated] Android 9 Pie battery drain "appears" to be Google
How to Confront Friends Who Are Ignoring You. There may well be times in your life when your friends abruptly cease talking to you and pretend that you no longer exist. The feeling of being ignored can be worse than feeling rejected
How to Search Your Emails in Gmail Like a Pro
The iPhone's Health app has long been useful for tracking all sorts of medical data, but iOS 11.3 is bringing even more functionality to your Health app. Medical records such as lab results, immunizations, and more can now be organized and shared with a new feature of the Health app, called Health Records.
Use the Health app on your iPhone or iPod touch - Apple Support
Quick Tip: Speed Up Gboard Performance on Android by Disabling These Two Settings News: Twitter Hijacks Tim Cook's Pokémon Go Tweet with iPhone Battery Complaints How To: 9 Ways to Improve Battery Life on Your iPhone X, X S, X S Max & X R
Suggestions for Blacksmith Outfit? « Steampunk R&D :: WonderHowTo
Google Home Easter eggs: Best games. As we said, Google Home is good for showing off to friends, and what better way than with a few games? Even if you're alone, you can still have some fun with these. OK Google, I'm feeling lucky. OK Google, Mad Libs. OK Google, what am I thinking right now? OK Google, spin the wheel. OK Google, flip a coin.
Google Assistant Has A Pretty Fun 'I'm Feeling Lucky' Easter Egg
When you sign in to your Google Account, you can see and manage your info, activity, security options, and privacy preferences to make Google work better for you. You can review and adjust some privacy options now, and find even more controls if you sign in or create an account.
Managing Your Google+ Privacy Settings - Trend Micro
0 comments:
Post a Comment